

[ad_1]
Google My Business—now called Google Business Profile—allows business owners to reach customers via Google Search and Google Maps.
Maintaining a Business Profile helps you increase your visibility on Google, gain credibility with reviews, and control your business information.
In this article, we’ll cover:
- Why you should have a Google Business Profile for your business
- How to set up your Google Business Profile
- How to optimize your Google My Business profile
- Frequently asked questions
To start, let’s cover the basics of Google Business Profile, formerly Google My Business.
What Is Google My Business (Now Known as Google Business Profile)?
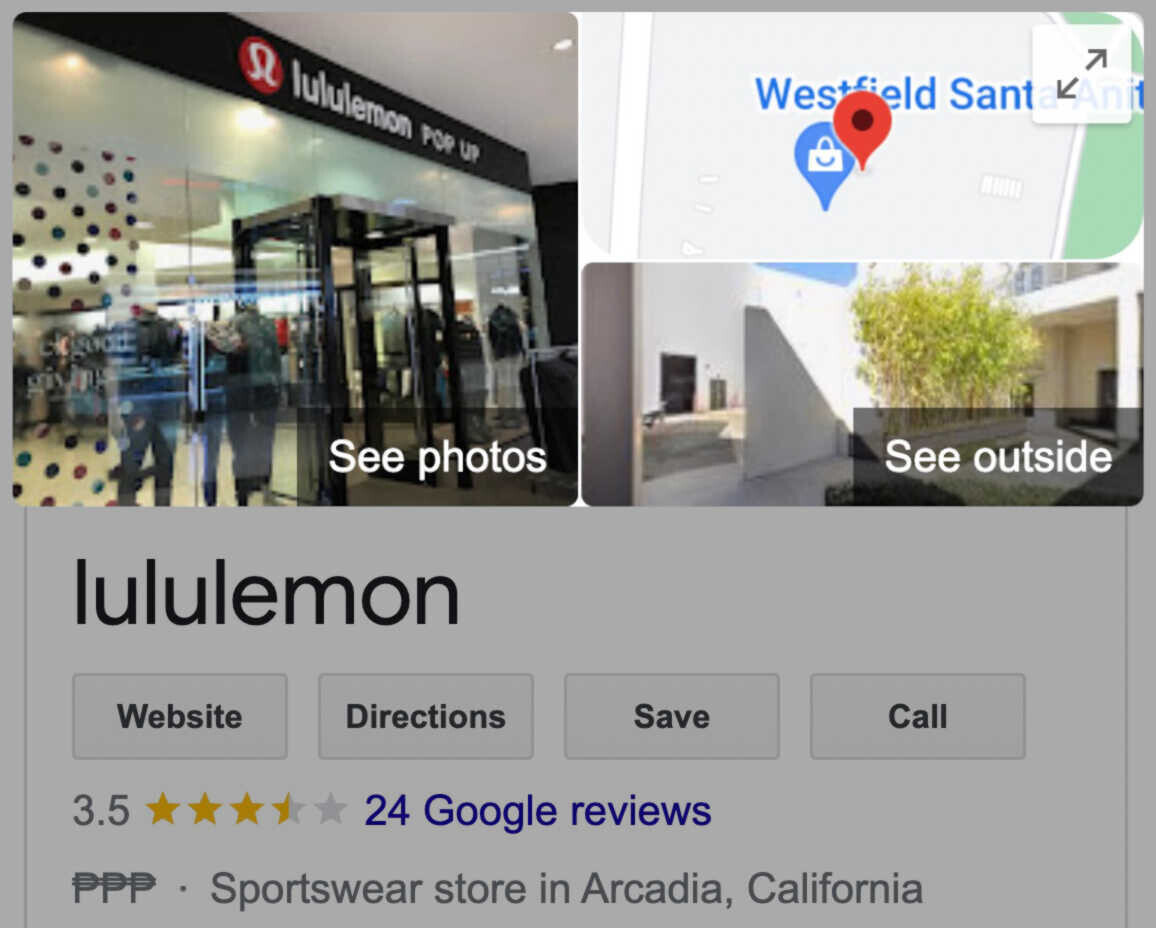
Google Business Profile (GBP) is a free tool that allows you to influence how your business appears on Google Search, Google Maps, and Google Shopping.
Using this tool lets you connect with customers, post business updates, list products or services, and more.
Here’s what GBP looks like:
Even if you don’t have a storefront, you can still have an account so long as you have contact with customers.
For example, if you’re a plumber, you may only see customers at their homes. But you can still have a Google Business Profile.
Is Google Business Profile Free?
It’s 100% free to create and manage your Google Business Profile.
And you can get a lot out of it without paying a cent.
What Are the Benefits of Google My Business?
There are three main benefits of maintaining a Google Business Profile:
- Increase visibility on Google
- Gain credibility with reviews
- Share business information with customers
Let’s look at each one in more detail.
Increase Visibility on Google
When you search for a business in Google, you’ve probably noticed the map and accompanying list of businesses that can appear at the top of the search results. This is called the “local pack” or “map pack.”
Here’s what it looks like:

The local pack appears for location-specific queries (or search terms that suggest location, like “restaurants near me”). It includes Google Maps results and business information.

Businesses with well-optimized Google Business Profiles are much more likely to appear in these results.
Mobile searches that include phrases like “where to buy” and “near me” have increased over 200% in recent years.
These are considered “discovery searches.” Instead of looking for a particular brand, users are looking more generally for a category.
So if a user is physically near your business and searches for a general term like “restaurant,” your business is more likely to pop up as a geolocated result if it’s well-optimized (we’ll get into more optimization tips later).
Like this:

Gain Credibility with Reviews
98% of users read online reviews for local businesses.
The star rating next to business names on Google Maps (which ranges from 1-5) is a cumulation of reviews.

Reviews provide valuable feedback about your business. You can reply to reviews, which can help build trust with your customers.
Customers don’t expect 100% perfect reviews, though. According to Google, a mix of positive and negative reviews is actually more trustworthy.
Responding to reviews—both good and bad—is a great way to build trust and credibility with your current and future customers.
Share Business Information With Customers
You can display your business hours, contact information, services, and more through your Google Business Profile.
Additionally, you can update your customers about temporary changes. For example, you can display holiday hours or mark your business as temporarily closed or fully reopened.
How to Set Up Your Google Business Profile From Scratch
If your Business Profile already exists and you only need to claim it, skip these steps and head to the next section. If not you’re starting from scratch—follow along:
Step 1: Go to Google Maps and Add Your Business
To get started, navigate to Google Maps and open the menu by hitting the button on the top left corner of the page.
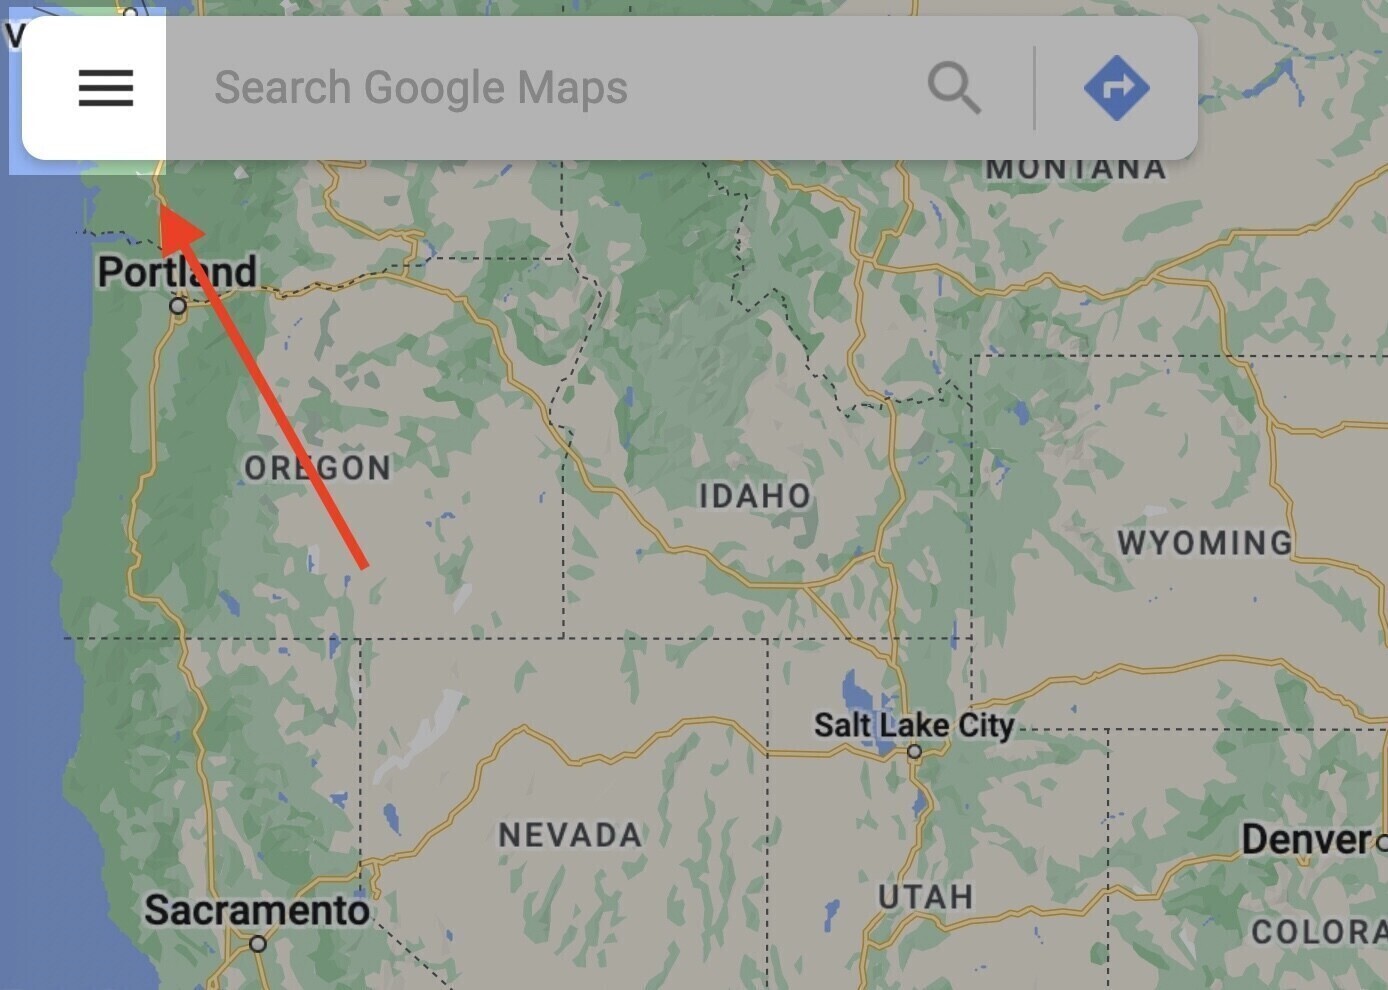
On the menu, look for the “Add your business” button.

Step 2: Create Your Business Account
If you already have a business account, simply sign into your account and skip this section.
If you don’t have an account, follow along to create a new one.
Click on the “Create account” button and choose “To manage my business” from the drop-down menu.

Then, fill out your information (e.g., your name, preferred username, etc.), and click the “Next” button.

After that, you’ll need to verify your identity with a phone number.

Google will ask for a few more details, then send you to their terms and conditions page.

Hit the “Agree” button on the terms and conditions page to start setting up your profile.

Step 3: Fill Out Your Business Name and Category
Now it’s time to set up your Business Profile. The first step is to choose your business name and category.
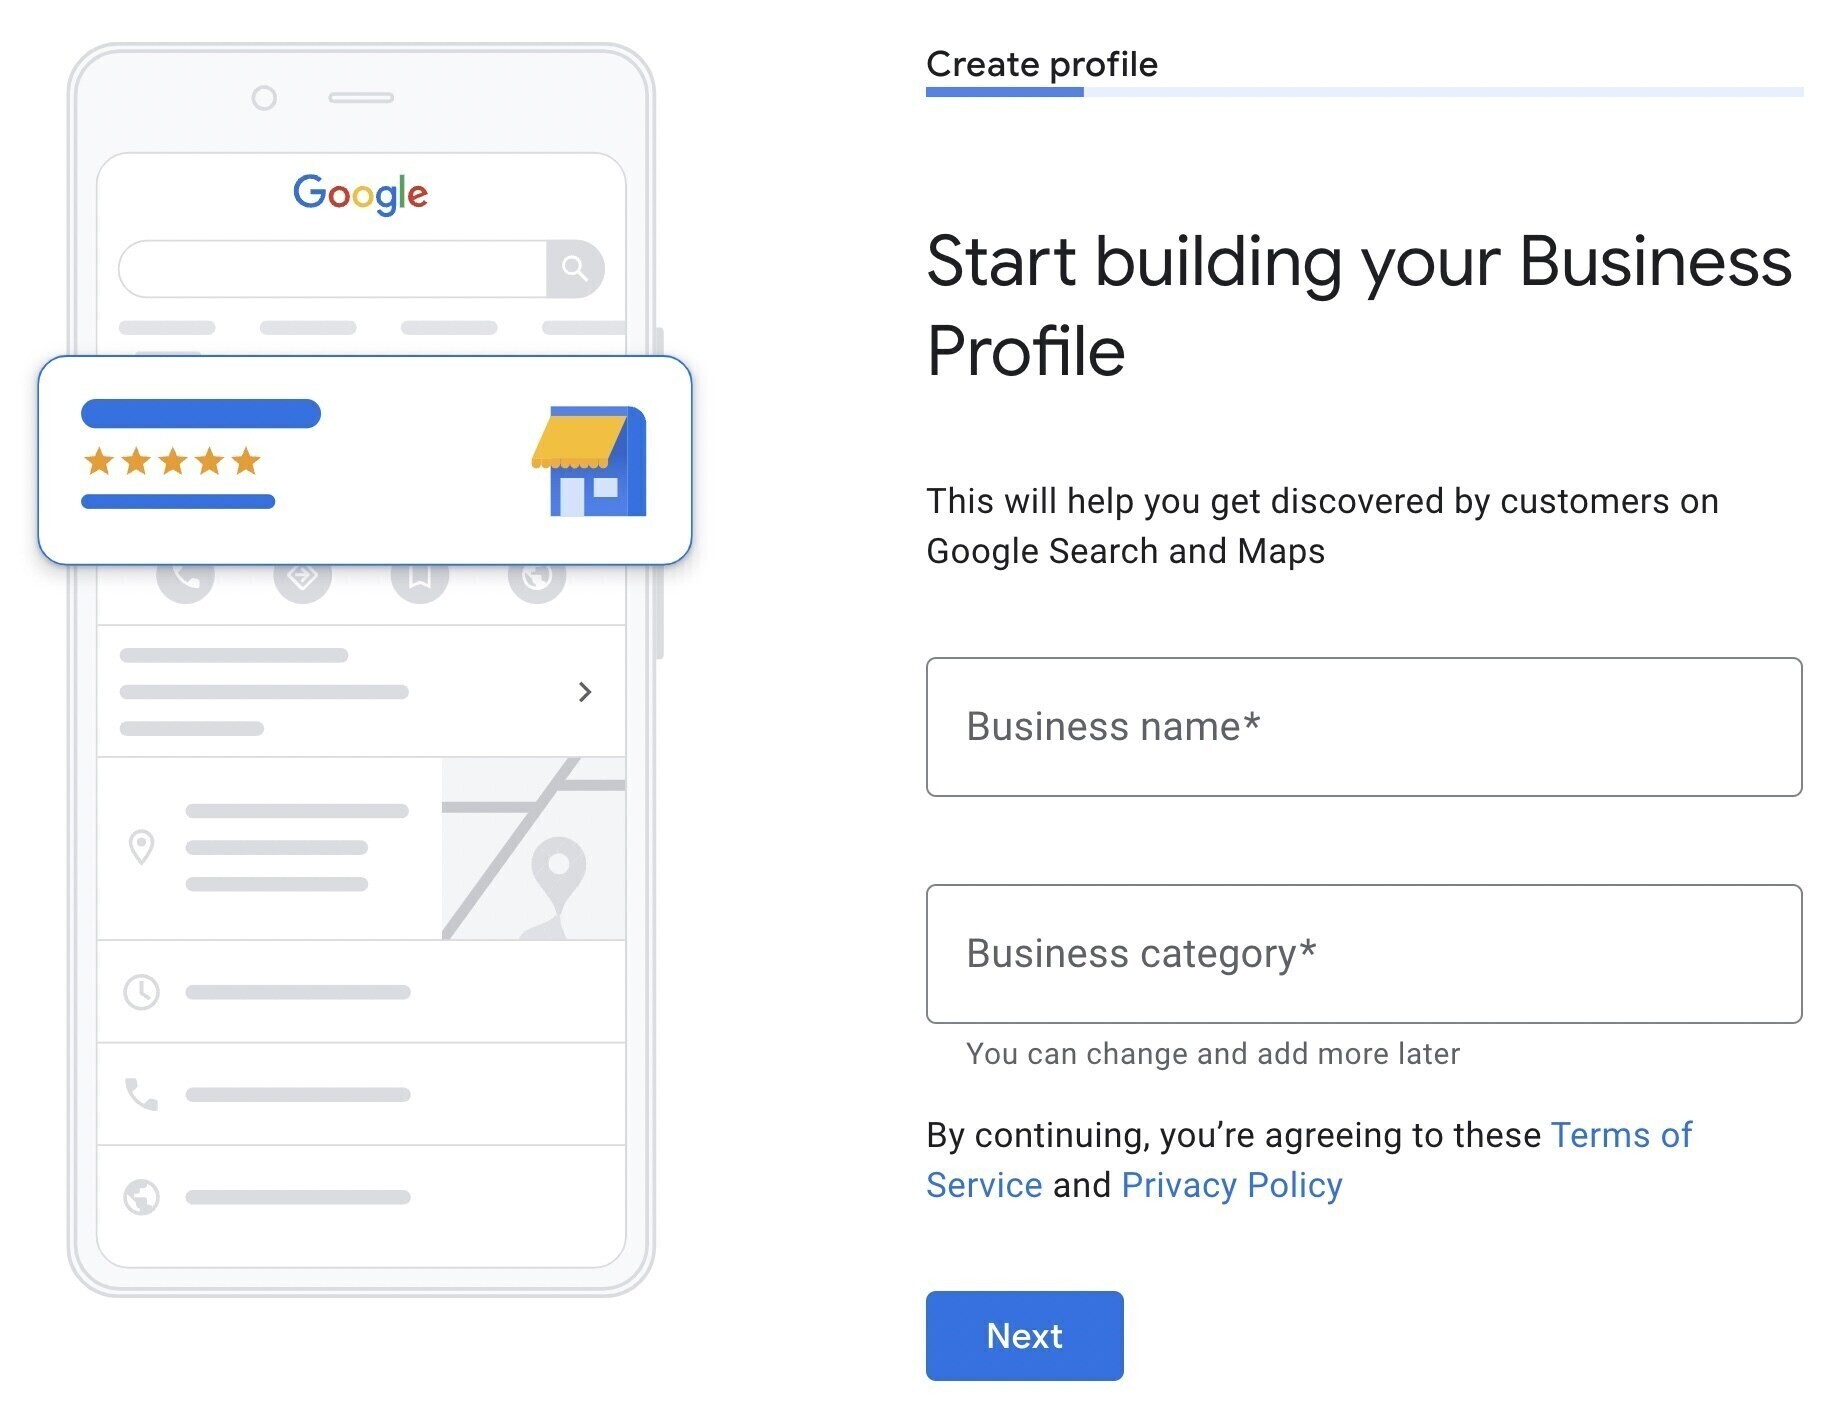
First, type out your business name. As you type, Google will show you a list of existing businesses in its database.

If your business is on the list, skip to the next step to learn how to claim your business. If it’s not, fully type out your business name.
Write your business name exactly as is. (Don’t try to stuff your business name with keywords, as Google may suspend your account. You’ll add relevant keywords in your Business Description later.)
Next, start typing out your business category and choose one from the list:
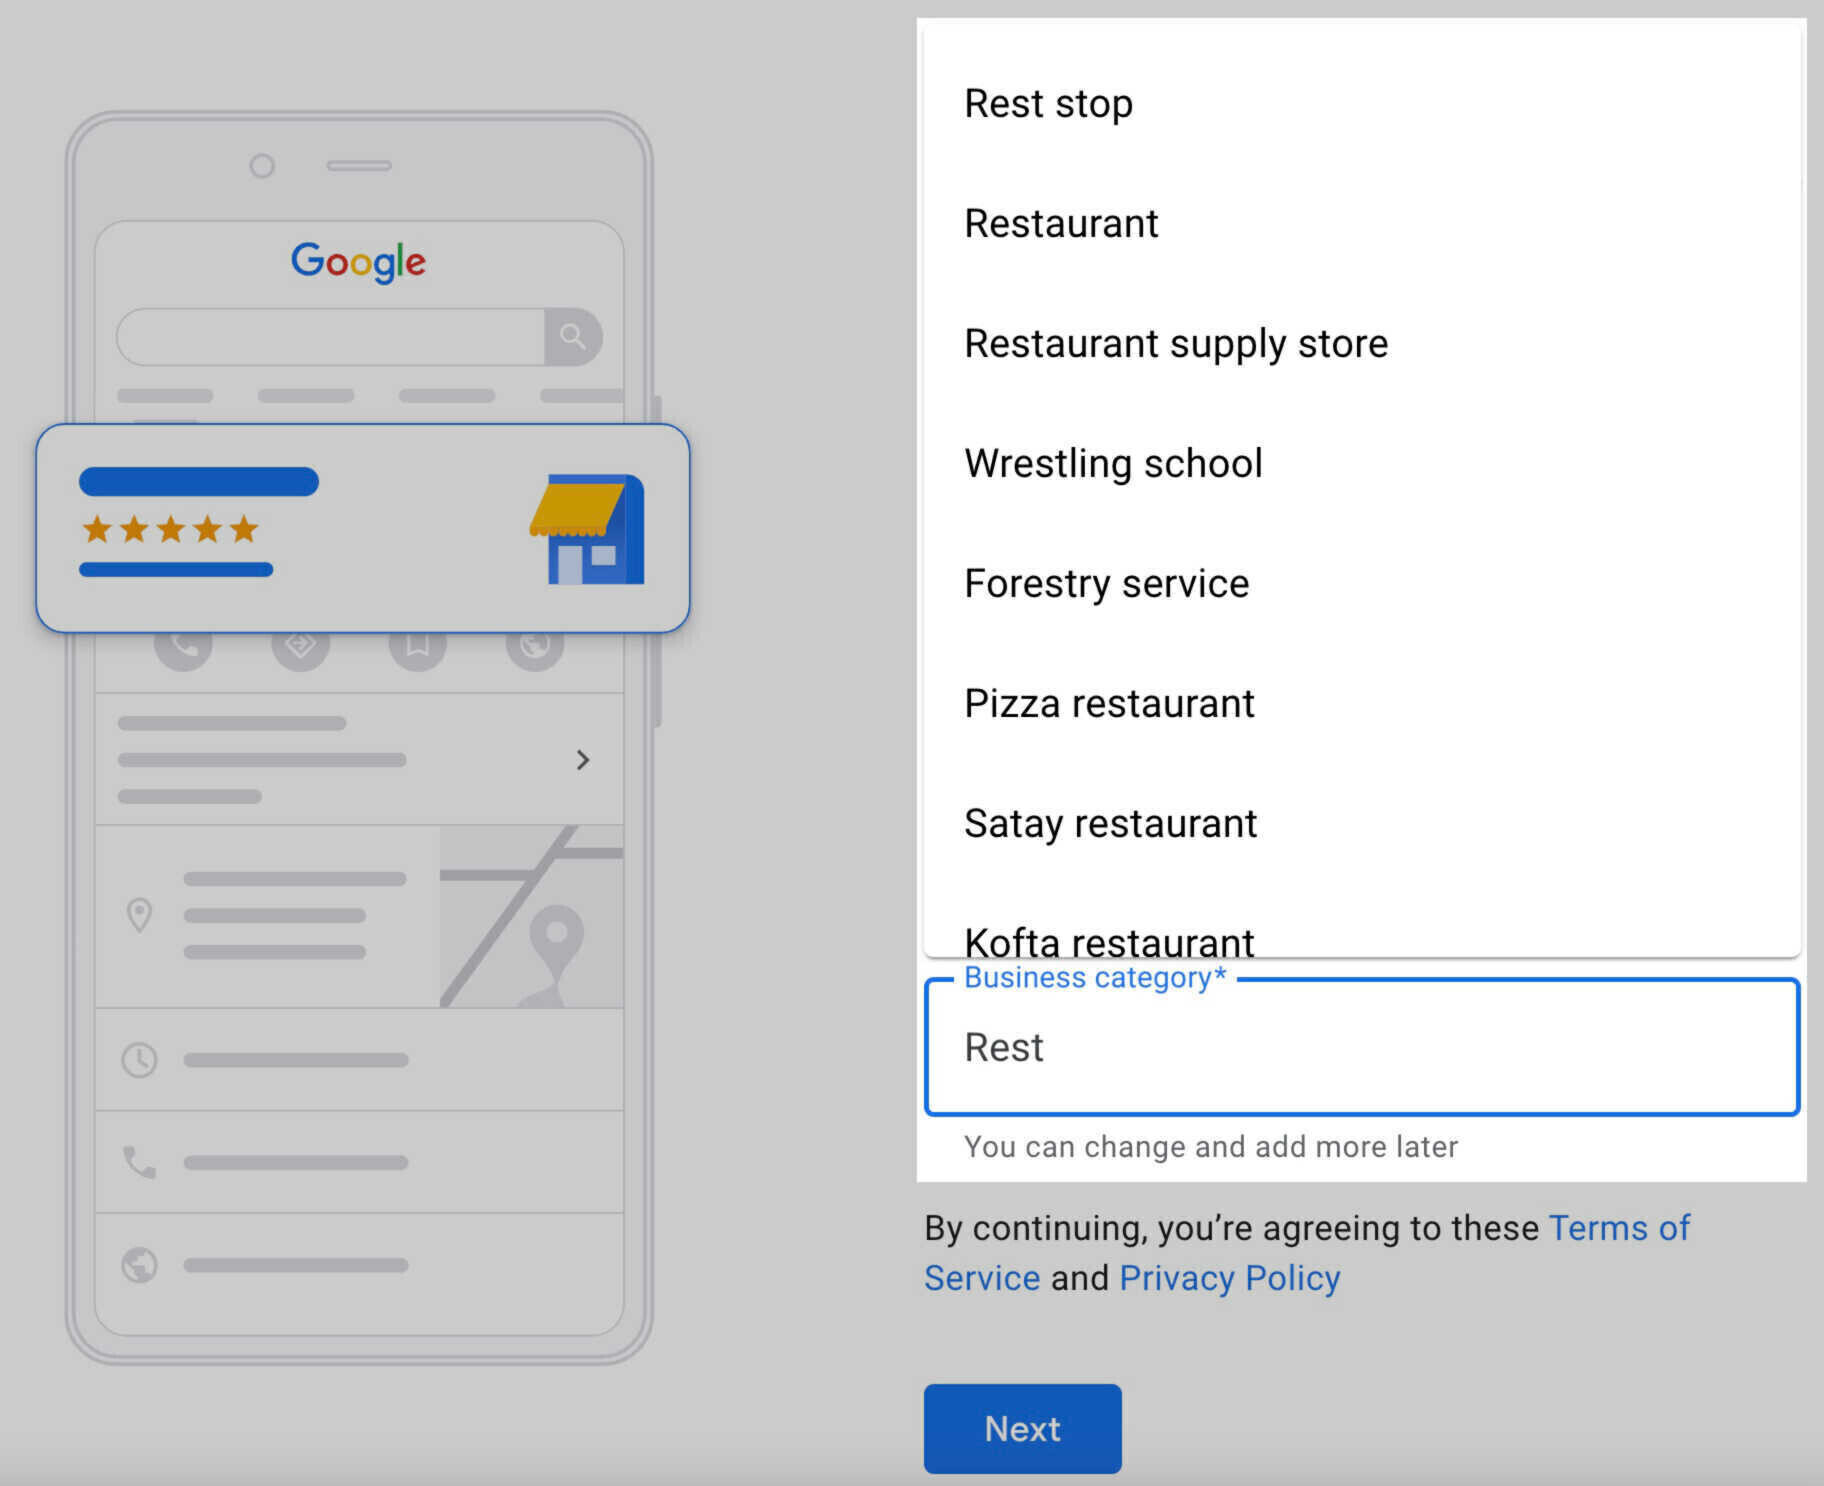
Your business category tells Google what kind of business you have, making it more searchable.
You can always change your business category or add more categories later.
Step 4: Add Your Location
Next, add a location if you have a physical location. While this is usually an optional step, some business categories, like “Restaurant,” require you to add a location.
If you don’t have a storefront, choose “no” to skip this step.

If you choose “yes,” Google will ask you for your location’s address. Searchers will see your address on Google Maps, so make sure you enter an accurate location.

Google also uses your address to give you a list of potential duplicate listings.
If one of the duplicate listings is yours, skip to the next step to learn how to claim your business. If not, select “None of these.”

Step 5: Choose Your Service Area
This step will look different based on whether you added a business address.
If you added a business address, this step is optional. Google will ask you if you provide deliveries or home and office visits.

Choose “Yes” to tell searchers what areas are within your reach.
Choose “No” to skip to the next step.

If you didn’t add a business address, then you can’t skip this step. Simply choose an area from Google’s suggestions or start typing the name of the area you serve.

Step 6: Add Your Contact Information
Next, add your phone number and website URL, if you have one.
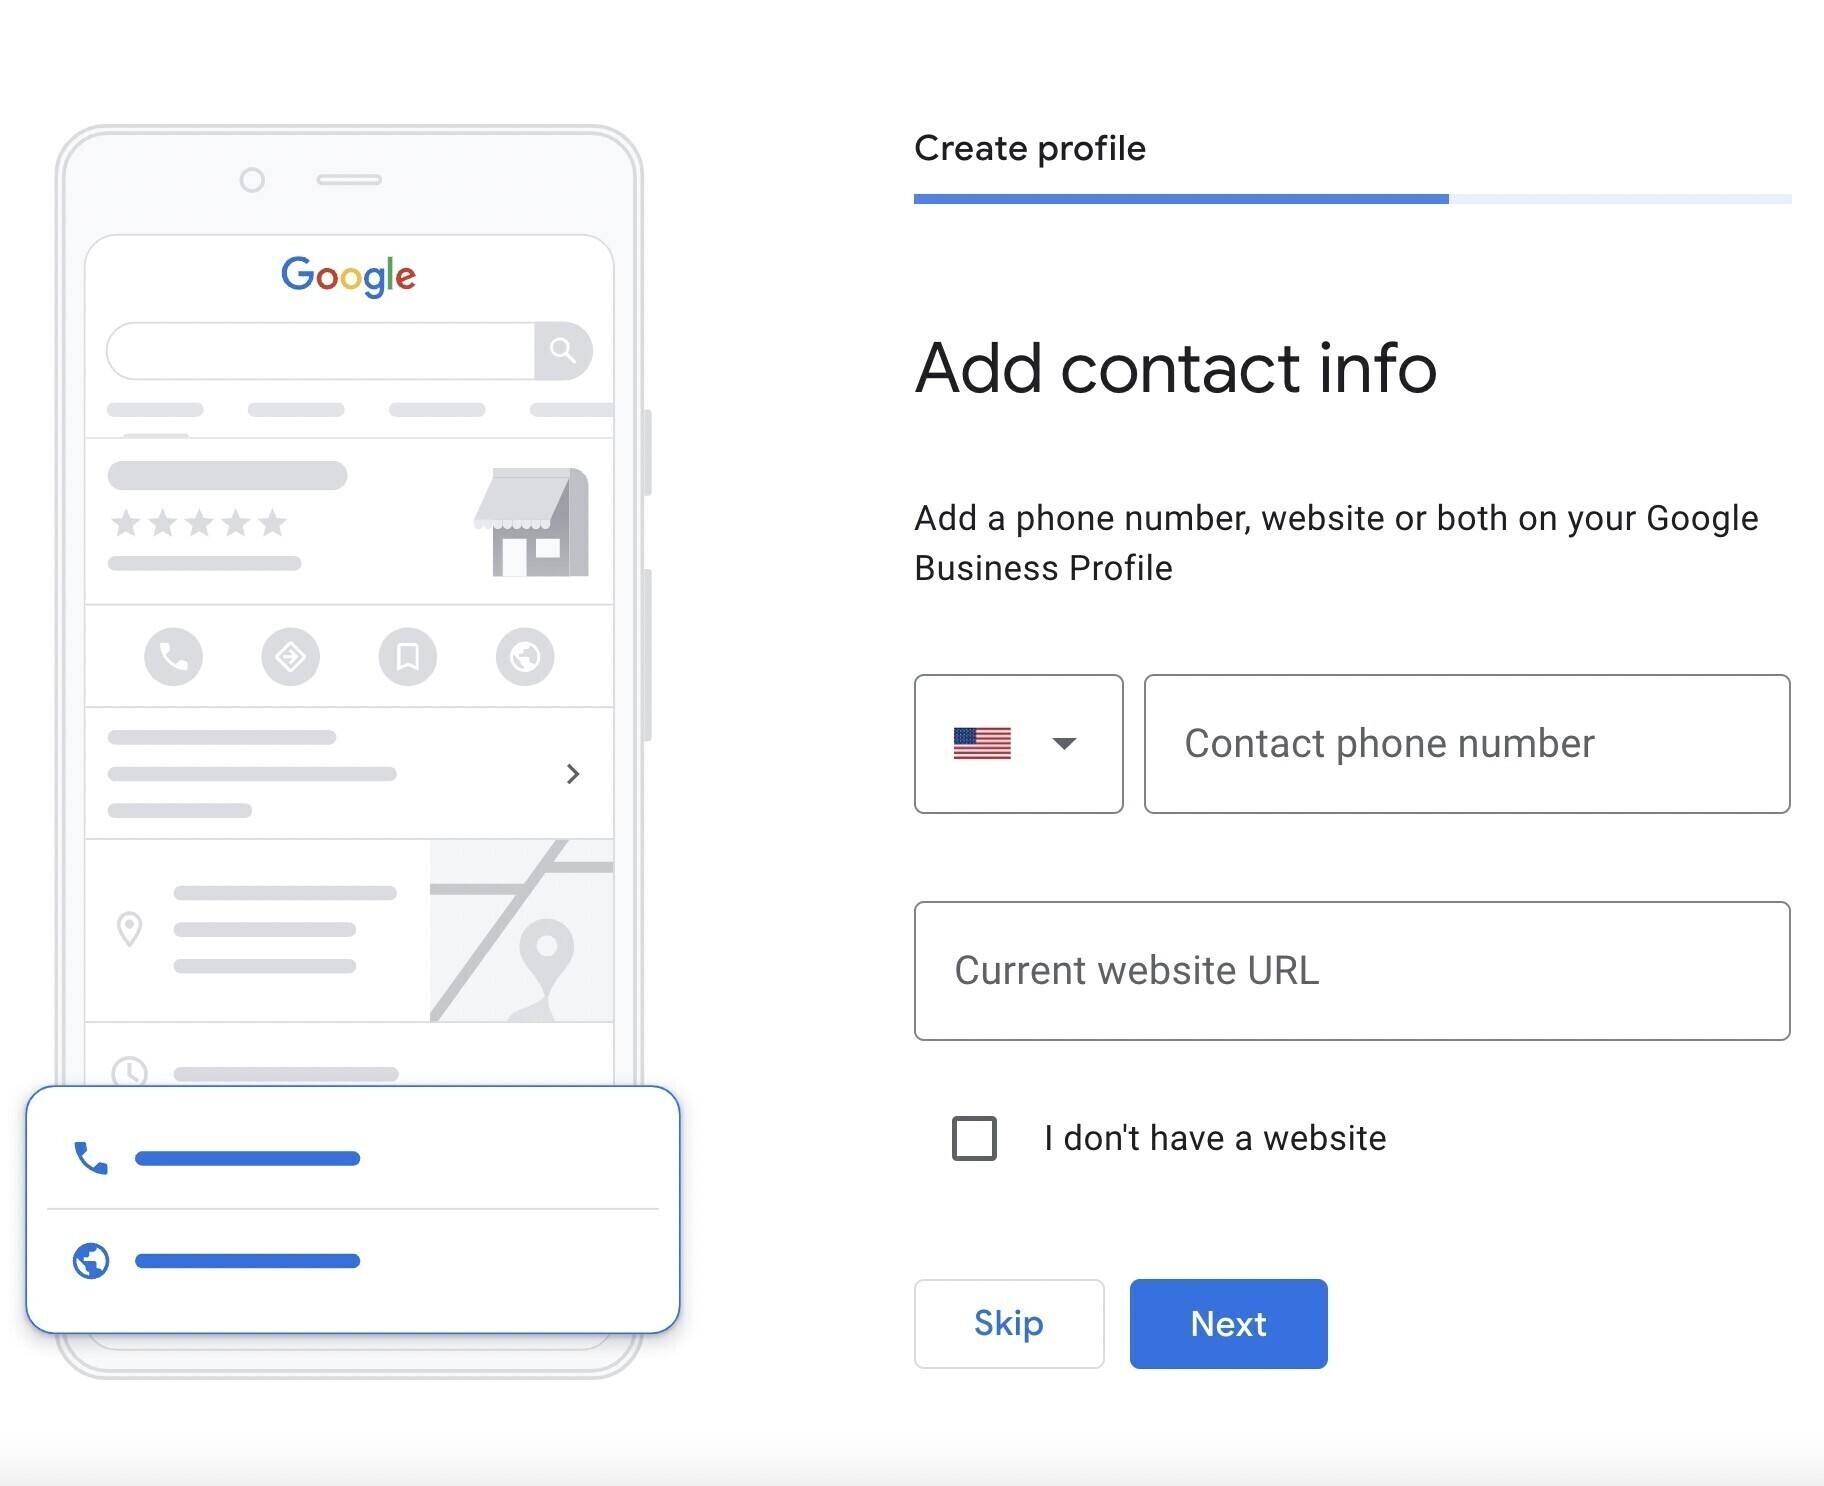
Searchers will find and contact you through your provided contact information, so double check that it’s correct.
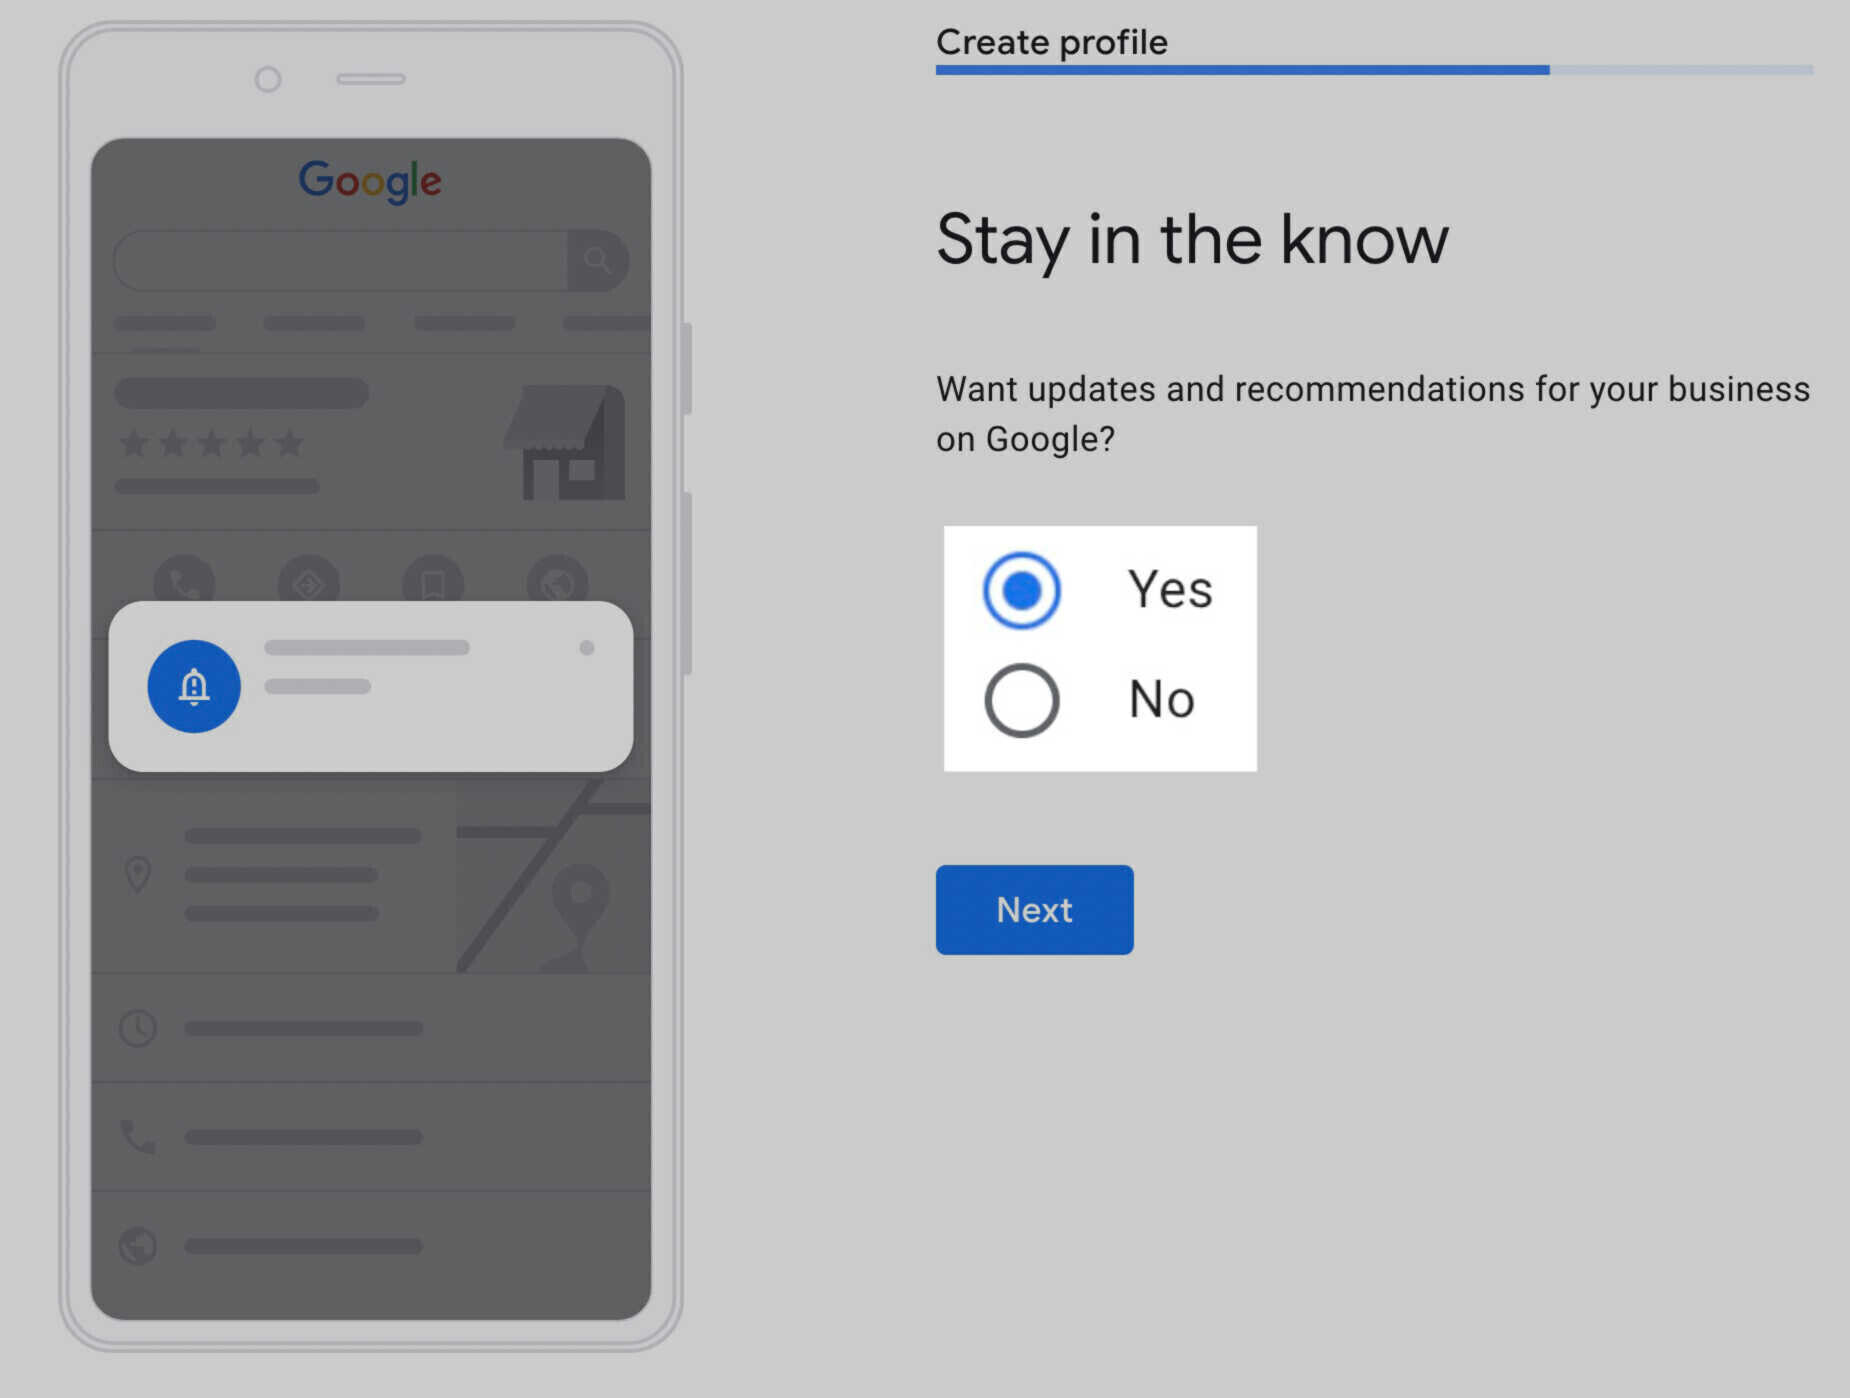
Step 7: Opt In to Updates and Recommendations
Google will now ask if you’d like to opt in to updates and recommendations for your GBP. We recommend selecting “yes” so you can hear about best practices directly from Google.
Step 8: Verify Your Listing
Your Business Profile won’t become searchable until you verify it. So while you have the option to skip business verification during your initial setup, you’ll need to verify your listing eventually.
There are five ways to verify your listing:
- By phone. You’ll receive a Google automated call or text with your verification code.
- By email. You will receive an email containing your verification code.
- By postcard. You will receive a postcard at your registered address containing your verification code.
- By video recording. Record a video that shows proof of location, your business equipment, and that you are indeed an authorized manager of the business.
- By live video call. Show the same proof for the video recording, but on a live call with a support representative.
Your verification options change depending on whether or not you’ve added a location. If you have a physical location, then you need to verify your business by postcard.
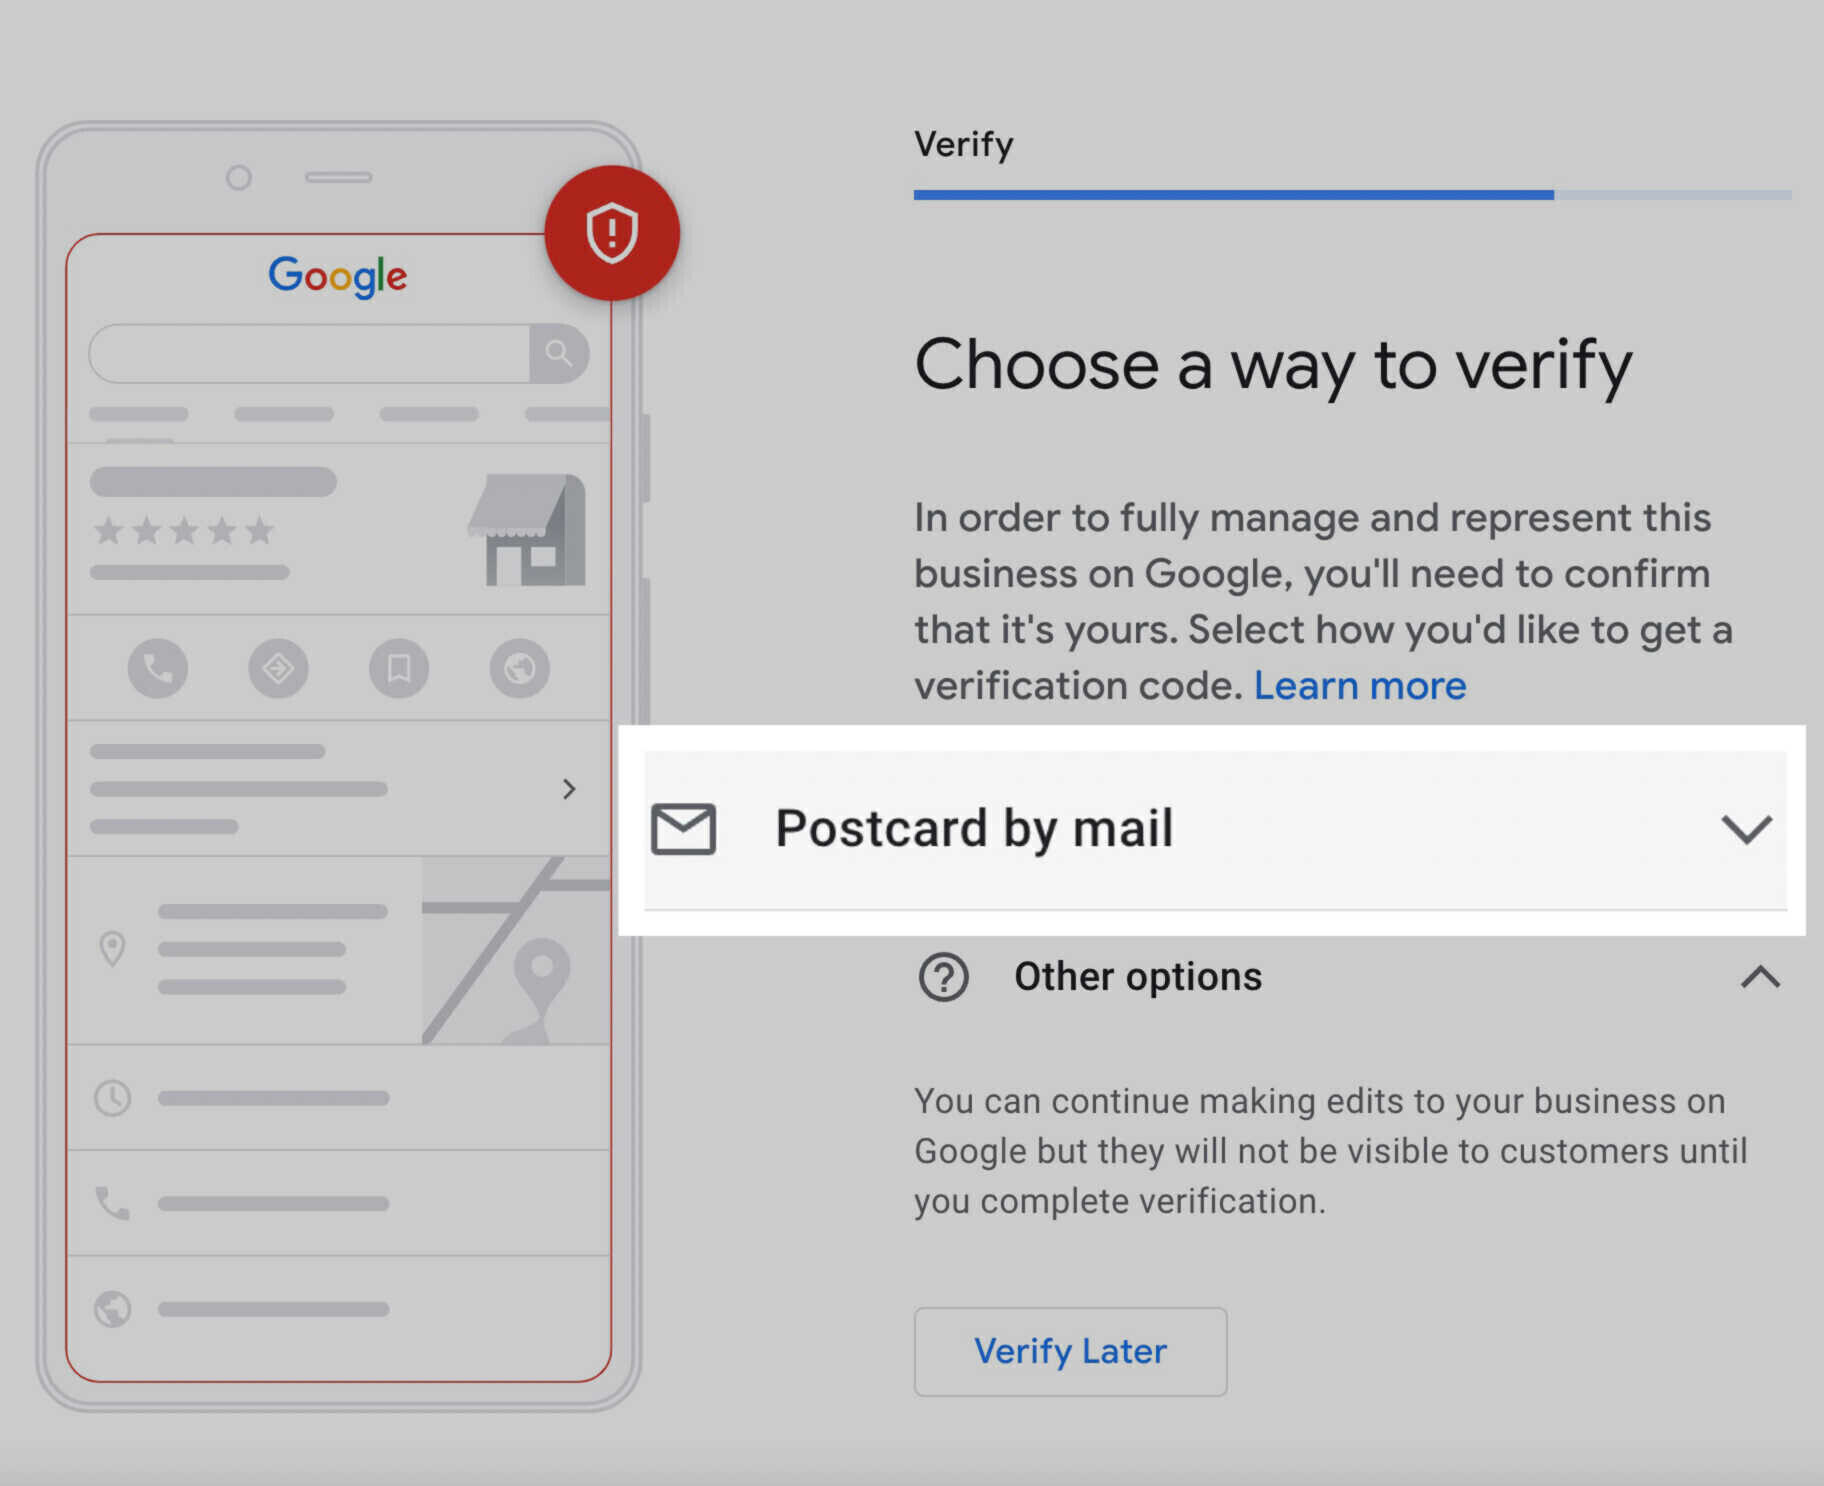
The postcard contains a five-digit code, which you’ll enter when logged into your account.
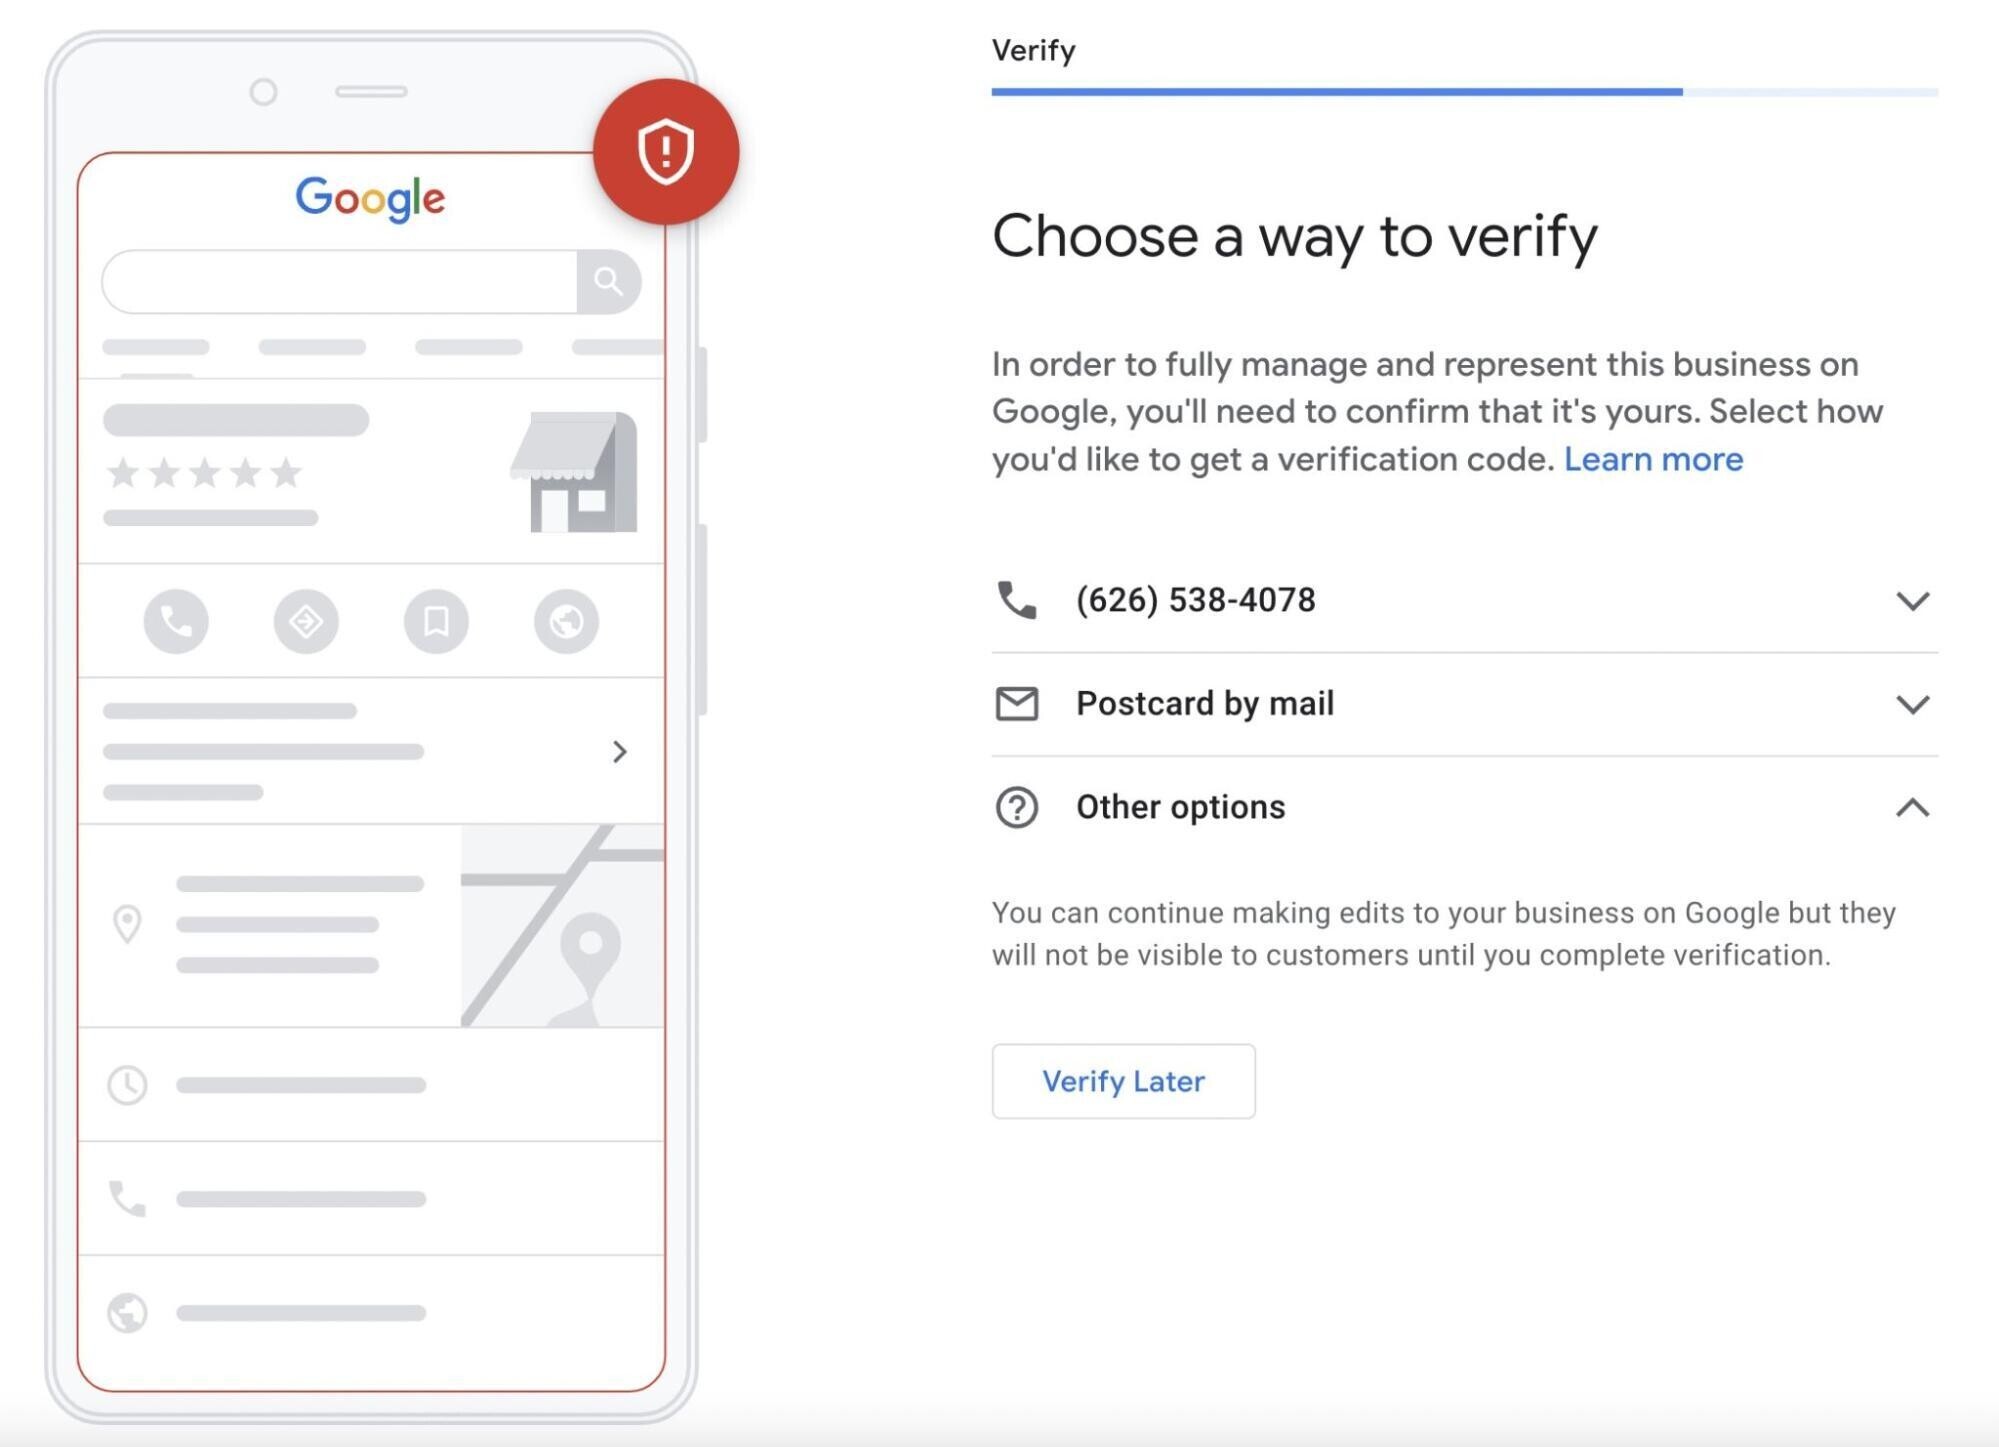
If your business doesn’t have a physical location, you will need to enter your personal address for verification purposes.

After which, you can choose between receiving a phone call, text message, or one of the “Other options.”

If the available verification options for your business don’t work for you, you can contact the Google Business Profile team through their help center.
Bonus Step: Add More Information & Opt-in to Google Services
After the verification step, Google will prompt you to add more information about your business and opt in to relevant services, based on the business category you chose.
You can add specific services you offer, set your hours, enable messaging, and more.
We recommend filling in as much as you can. After all, information like operating hours and business photos will help your potential customers reach you better.
Here are the optional steps where you can add more information or opt in to additional services:
Specific Services You Offer
Selecting certain business categories will allow you to specify what types of services you offer.
Marketing agencies, for example, can add “Telemarketing” as a service or create a custom service like “SEO.”

Operating Days and Hours
Next, you will need to add your business’s operating days and hours.
Select all the days of the week that your store is open. Then, set opening and closing times per day that you set to “Open.”

Messaging Through Google
Google has a feature that allows searchers to message you directly from your Google My Business listing. We recommend only enabling it if you regularly monitor your Google business account.
To do so, toggle the “Accept Messages” option found on the “Add messaging” page.

Even if you disable messaging through Google, your potential customers will still be able to contact you through the contact information you’ve provided.
Business Description
Google gives you 750 characters to briefly describe your business.

According to their guidelines, your business description should include:
- Your products or services
- Your unique selling point
- Your history
- Anything else searchers might find helpful
After you write your business description, run it through a spelling and grammar checker like Grammarly. Google may suspend Google Business Profiles due to errors in your business name or profile.
Other things you should avoid in your business description are:
- Offensive content
- Links
- HTML code (make sure everything is in plain text)
- Sale announcements
Business Photos
Add photos of your business to show your customers what your space looks like, what products you sell, and more.
You can add specific photos based on your business category. For example, restaurants can add photos of their menu and specific dishes.

Adding photos to your profile makes your business look more attractive to customers.
It gives them a genuine idea of what your business looks like—and can even expand your reach—without running ads or trying to sell something.
We’ll cover additional tips on GBP images later.
Google Ads
Lastly, you can set up Google Ads. But this isn’t required, and it will not impact how often your business shows up in the free organic search results.

How to Claim an Existing, Unverified Listing
Google auto-generates and updates business information all on its own. So an unmanaged, unverified listing of your business may already exist within Google’s database.
All you need to do is claim your listing and add it to your dashboard.
Claiming your listing will allow you to keep your business information accurate, make announcements, and respond to customer reviews and questions.
Here’s how to do it in four easy steps:
Step 1: Search For Your Business on Google Maps
First, go to Google Maps and search for your business name.

If you don’t find your business within Maps, then the listing probably doesn’t exist. In which case, you need to create one from scratch. (See the previous section for a step-by-step guide.)
Step 2: Look for the “Claim this Business” Button
After finding your business in Google Maps, look for the “Claim this business” button or “Own this business?” link.

If you can’t find either of those buttons, then one of two things has happened:
- The listing is already verified. To claim a verified listing, you need to get in touch with the existing business manager. Skip to the next section for a complete step-by-step guide.
- You are already the profile manager. Log into your Google account and head to your Business Profile Manager dashboard to see if the listing has already been assigned to your account.
Step 3: Click “Manage Now”
On the next page, you’ll see a “Manage now” button. If you’re sure the listing is your business, hit the button.

If you realize the business is not yours, click “I own or manage another business” to create a new listing.
Step 4: Verify Your Business
Verifying your business proves to Google that you indeed manage the business listing that you are trying to claim.
Google will only allow you to manage your listing—i.e., respond to reviews or edit information—after you verify ownership.
Again, you can verify your listing by phone, email, postcard, recorded call, or live call.
After you verify that the business listing is indeed yours, you will be able to manage it through your GBP Manager dashboard.
How to Request Access to a GBP Managed by Someone Else
If you can’t find the “Claim this Business” button on your existing business listing, then it’s probably already being managed by another account.
Here’s how you can reclaim the profile in three steps:
Step 1: Go to the Create Page
Head to the Create page and search for your business.

You should see a drop-down menu filled with existing listings in the Google database. Select the business listing that you want to claim.
Step 2: Request Access
Google will confirm that the listing you want to claim is owned by another email address.
If the email address is yours, sign into it and you should gain access to the listing. If you’ve lost that email address’s log-in information, check out Google’s Account Recovery guide.
If the email address isn’t yours, hit the “Request Access” button.

Step 3: Fill Out the Form
Google will then ask you to fill out a few personal details, including your name, contact number, the level of access you require, and your relationship to the business.

After you hit submit, the account holder who’s managing your listing will receive your request. They then have three days to either grant you access to the profile or reject your request.
If you don’t hear back, you might have been granted permission to claim your profile yourself. Go to your GBP manager dashboard and look for the option to claim your business.
Google will grant you full management access to your new business listing seven days after you become the new owner.
How To Optimize Your Google My Business Profile
Now that you’ve set up or claimed your listing, it’s time to optimize it. Here are ongoing steps you can follow to maintain a well-optimized Google Business Profile.
Review NAP Consistency
NAP is the most important information in your Google My Business profile. It stands for name, address, and phone number.
NAP consistency helps potential customers identify and find your business. It’s crucial to keep this information consistent anywhere your business appears online to avoid confusion.
Start by making sure everything is correct in your business account.
Navigate to the “Info” tab and check that your business name, address, and phone number are accurate.

While you can manually manage your business information in local directories, it’s inefficient.
To save time and resources on admin, use a tool like Semrush’s Listing Management to automatically manage your NAP information across 70+ directories in the US.

Many SEOs also use a strategy called call tracking, or using different phone numbers that forward to your business phone number. By doing this, you can track which channel the call came from.
Here’s how you use call tracking without negatively impacting NAP consistency:
Head back to the “Info” tab of your Google My Business profile, and go to the phone number section.

Add your call tracking number as the “primary phone” option and your standard business phone number as an “additional phone” number.
By adding your main phone line as an additional number, it will remain connected to your business without messing up your NAP consistency.
Write a Business Description
Business descriptions give you space to provide information about products and services, as well as the history of your business.

Google recommends that you use your Business Description to provide helpful information about your products and services, as well as the missions and history of your business.
Focus on providing a relevant description rather than trying to cram in as many keywords as possible.
Here are some additional tips from Google on what not to include in your business description:
- Inaccurate or confusing information
- Profane language
- Specials or promotions
- Misspellings, gibberish, or gimmicky character use
For more information, read the full list of guidelines for representing your business on Google.
Add Images to Your Listing
Now that you have a Business Description, it’s time to add some images to help you stand out.
First, set a profile photo (usually your logo) and a cover photo that best represents your business. You can also upload additional business photos to your Google My Business listing.
Some examples of business photos to add include: exterior photos, interior photos, product photos, photos of your team at work, and common areas.
Here are GBP’s photo size guidelines:
- File size: Between 10 KB and 5 MB
- Profile photo: 250 x 250 px
- Cover photo: 1080 x 608 px
- Google posts: 1200 x 900 px
- Business photos: 720 x 720 px
- Format: JPG or PNG
Create Google Posts
Share offers, events, products, and services directly to Google Search and Maps via Google Posts. You can find them toward the bottom of the Business Profile in the “From the Owner” section.
Here’s what they look like:

Posts can include text, photos, or videos. Here are the types of Google Posts you can create:
- Offers: Promotional sales or offers from your business. Include a title, start and end date, and photo or video. Can also include a coupon code, link, and offer details.
- What’s New: General updates about your business (or links to recent blog posts). Can include a photo or video, description, and action button.
- Events: Event promotion for your business. Requires a title, start and end dates, and a time. Can include a description, photo or video, and an action button.
Here’s how to create a post:
Step 1: Sign into your GBP manager account and go into the “Posts” tab
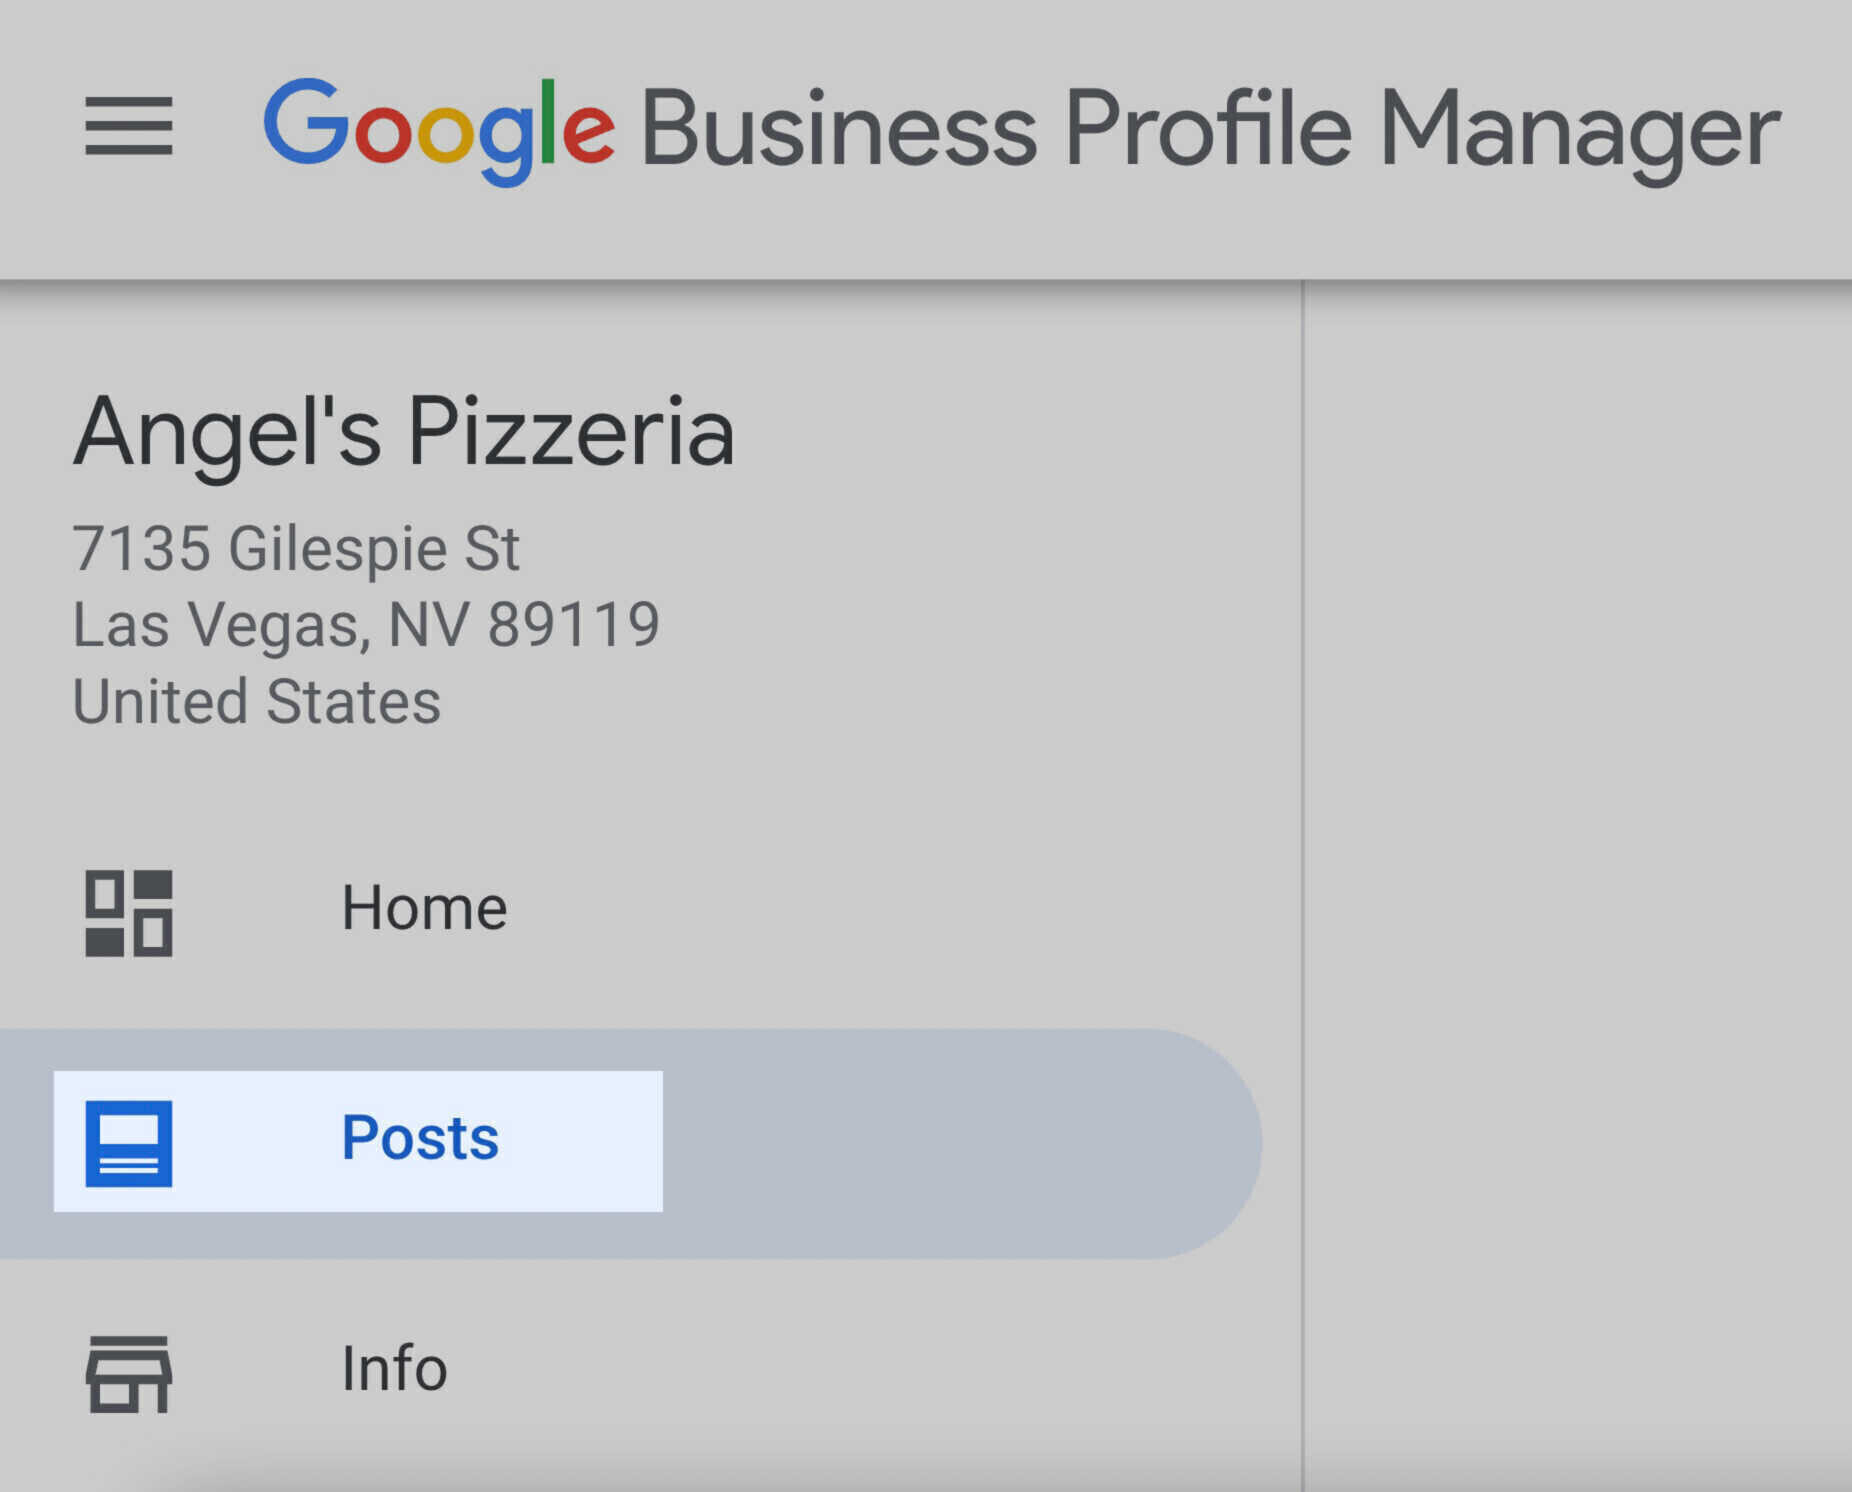
Step 2: Click on the button found at the bottom right corner of your screen to create a new post

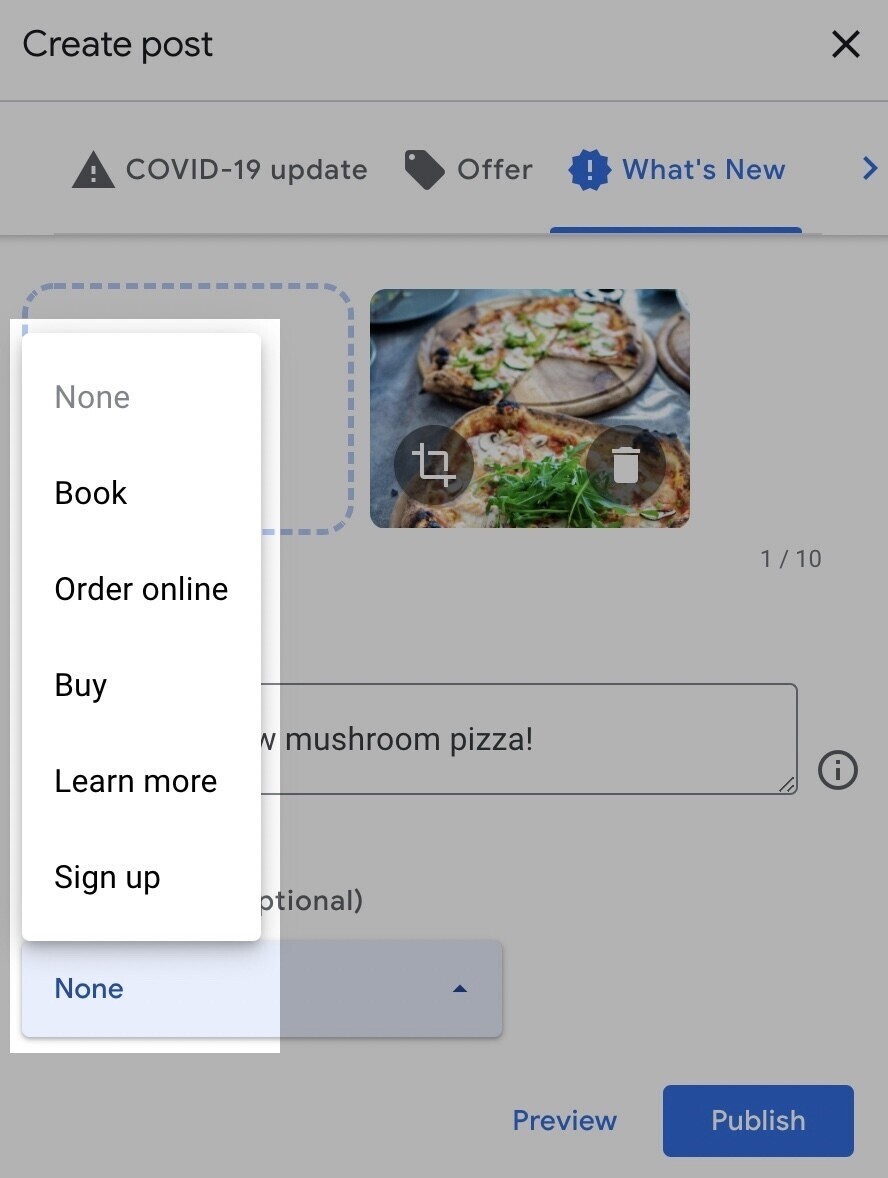
Step 3: Choose what type of post you want to create from the list given at the top of the page

Step 4: Write your post and add photos in the spaces provided. Here’s what that looks like for a “What’s New” type post

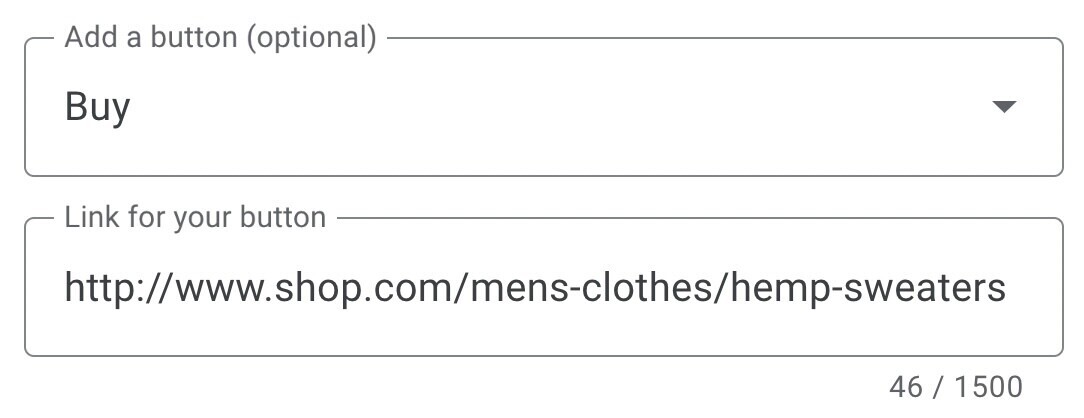
Step 5: If you want, you can add a button to make it easier for customers to get to your website, place an order, or take other actions
After you choose the type of button you want, you’ll have to add a link. This is where visitors will go when they click the button.

Step 6: Click the “Preview” button at the bottom right corner of your window to see what your post will look like when it’s live

Make changes if necessary.
Step 7: When everything looks good, hit the “Publish” button at the bottom right corner of the window

Your post will show up within your GBP.
To make the most of your Google Posts, be sure to include high-quality photos and post regularly.
Posts last for seven days (unless you choose an “Event” post and set a longer time frame). But because only a couple of posts are visible at once, there’s no benefit to having more than two live posts at a time.
Also be sure to keep things short and sweet. You can technically include up to 1,500 words, but only about 75-100 characters show up in the preview.
Because of this, it’s important to add any crucial information at the beginning. E.g., event dates, offer details, or business updates.
Pro tip: Schedule Google Posts directly from your Semrush account for free using Social Media Poster.
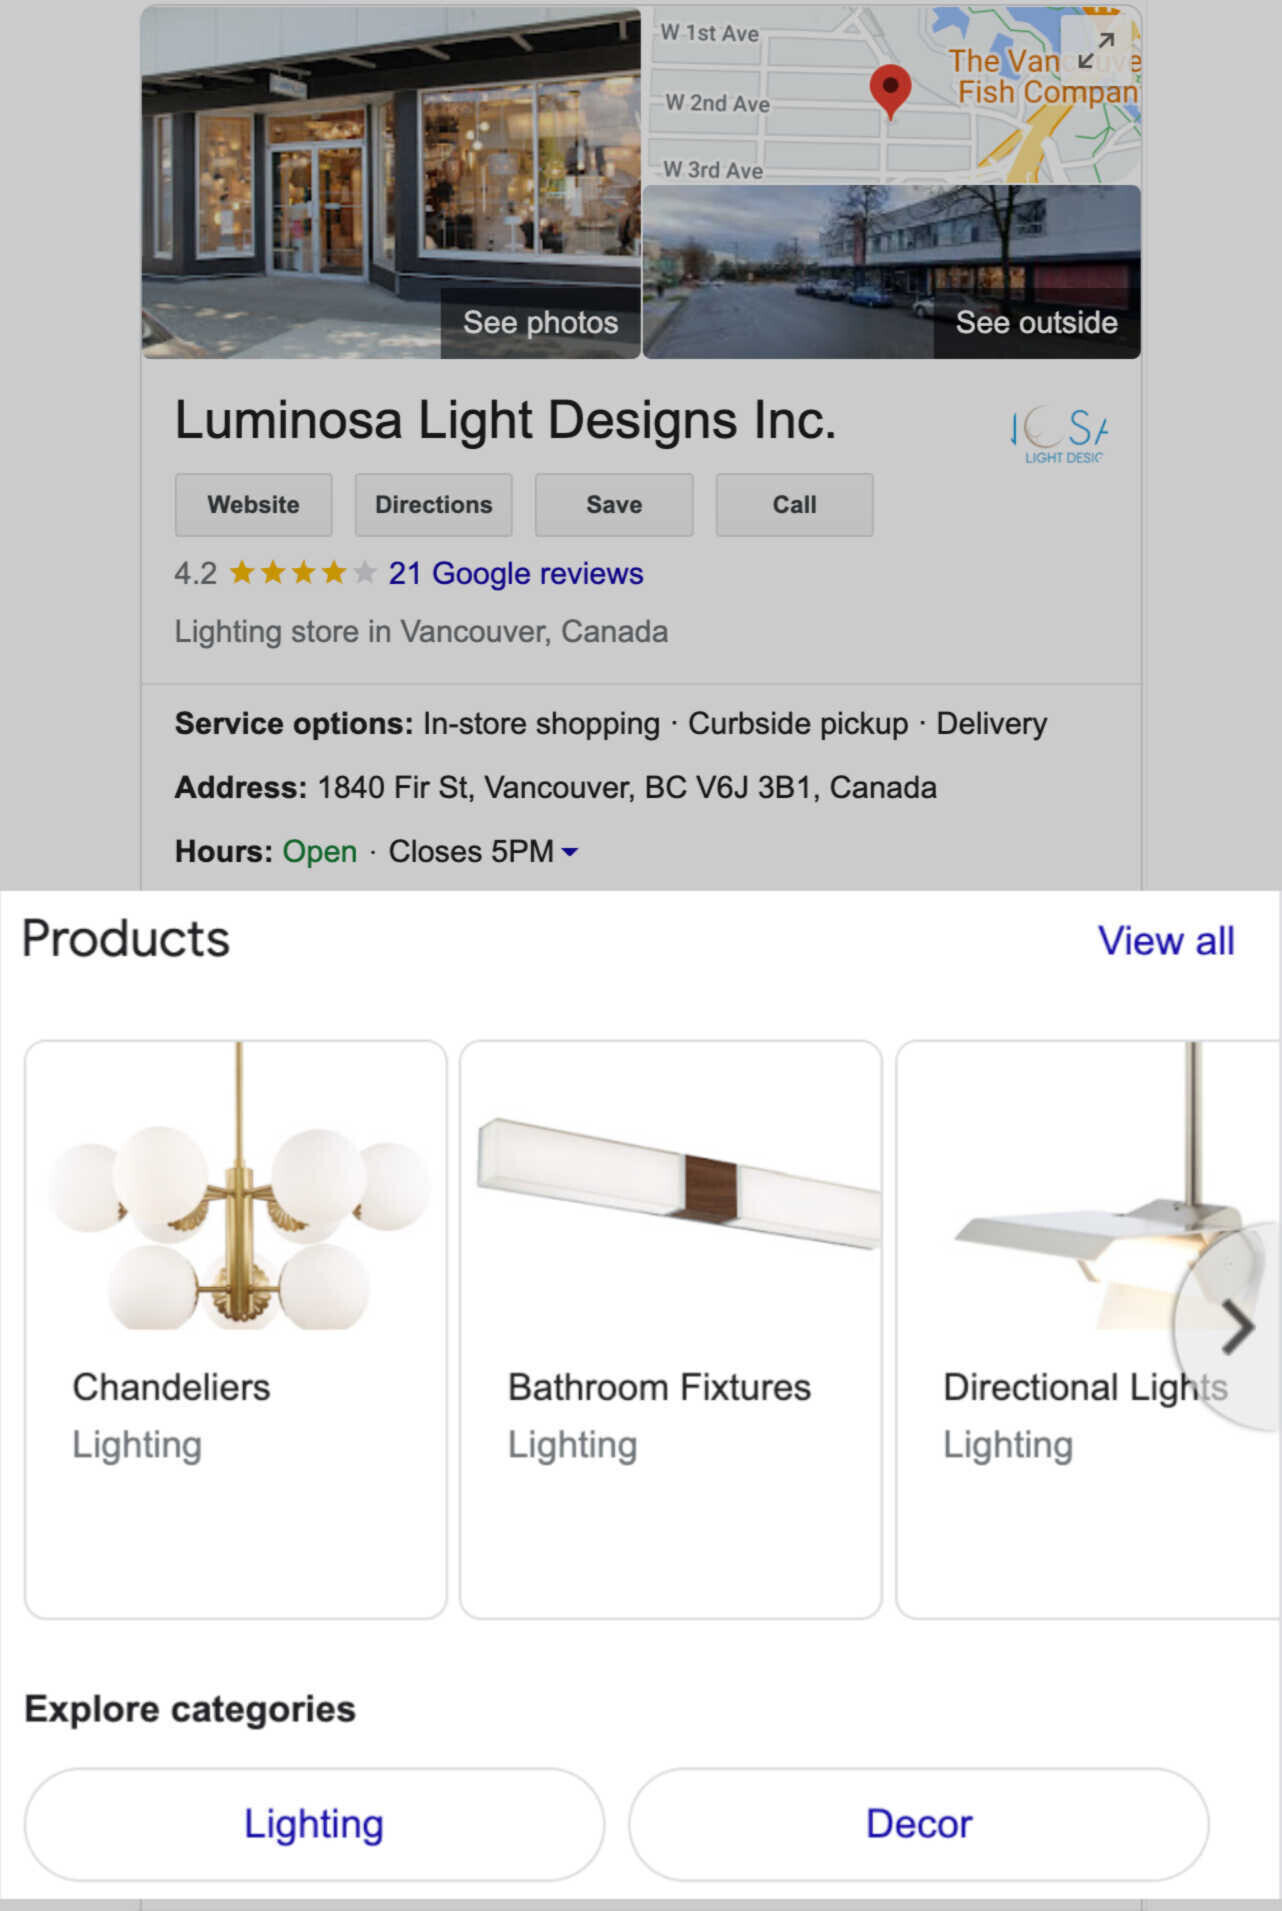
Feature Products on GBP
Highlight a curated list of products directly on your business listing by using Google Business Planner’s Product Editor.
Create collections with a minimum of three products, fill out the necessary details, and your users can click on individual products for more details.
Like so:
Product Editor is for small to medium-sized businesses and individual businesses in most verticals. Restaurants, on the other hand, can use the Popular Dishes feature.
Here’s how you add a product:
Step 1: Sign into your Business Profile account and go into your “Products” tab

Step 2: Click on the “Add product” button found near the top of the page

Step 3: In the window that pops up, upload a photo of your product and give it a name

Step 4: Scroll down to either select a product category or create a new one

Step 5: If you want to, you can add the item price and give it a short description

Step 6: We recommend choosing a button from the list and linking it to your website. Having a button within your GBP makes it easier for searchers to get to your product page
Step 7: Hit save and you’re done! It can take up to 30 minutes for your products to become visible to searchers

Keep in mind that recently edited products will show up first on your listing.
Respond to Reviews
Keeping tabs on your reviews is crucial, as they are one of the first things people will see if they Google your business name. So Google reviews play a big role in your business’s reputation and how people perceive it.
If you prefer to check your reviews manually, you can do so when logged into your GBP account.
You can also integrate Semrush’s Listing Management tool with your Google Business Profile to respond to Google (and Facebook) reviews more efficiently.

The Listing Management tool also allows you to track reviews by star rating, and monitor brand perception by the tone of voice used in reviews.
It’s against Google’s terms and conditions to offer incentives for customer reviews.
But you can remind them to leave reviews by providing a link in emails, on receipts, or at the end of a chat interaction.
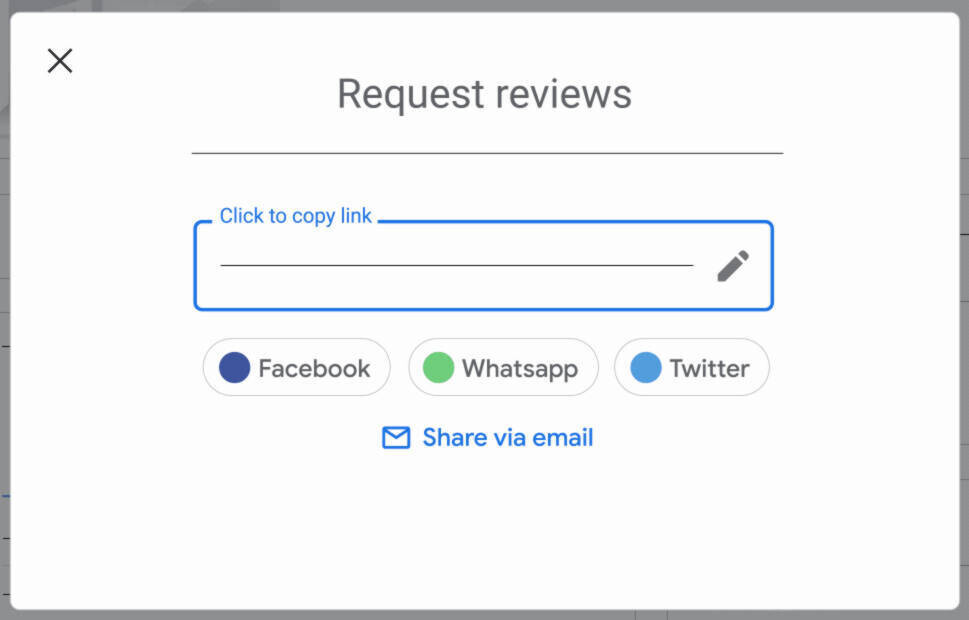
To get the link for your customers to leave reviews, log into GBP and look for the “Get more reviews” section right in the Home tab.
Then click on the “Share review form” button found within that section.

A pop-up with your review form link will appear. Copy it and share it with your customers.
Add Questions & Answers
Provide important information upfront by posting the answers to common customer questions directly to your profile. You can also let customers ask questions.
Here’s what questions from customers look like:

Be sure to keep up with any questions that come from your customers. Not only will this provide your customers with more up-to-date information about your business, but it can also help build your reputation and trustworthiness.
To find those questions, first search for your business on Google Maps.

Select your store, then scroll down to the “Questions & answers” section of your GBP.

Click on the “More questions” button.

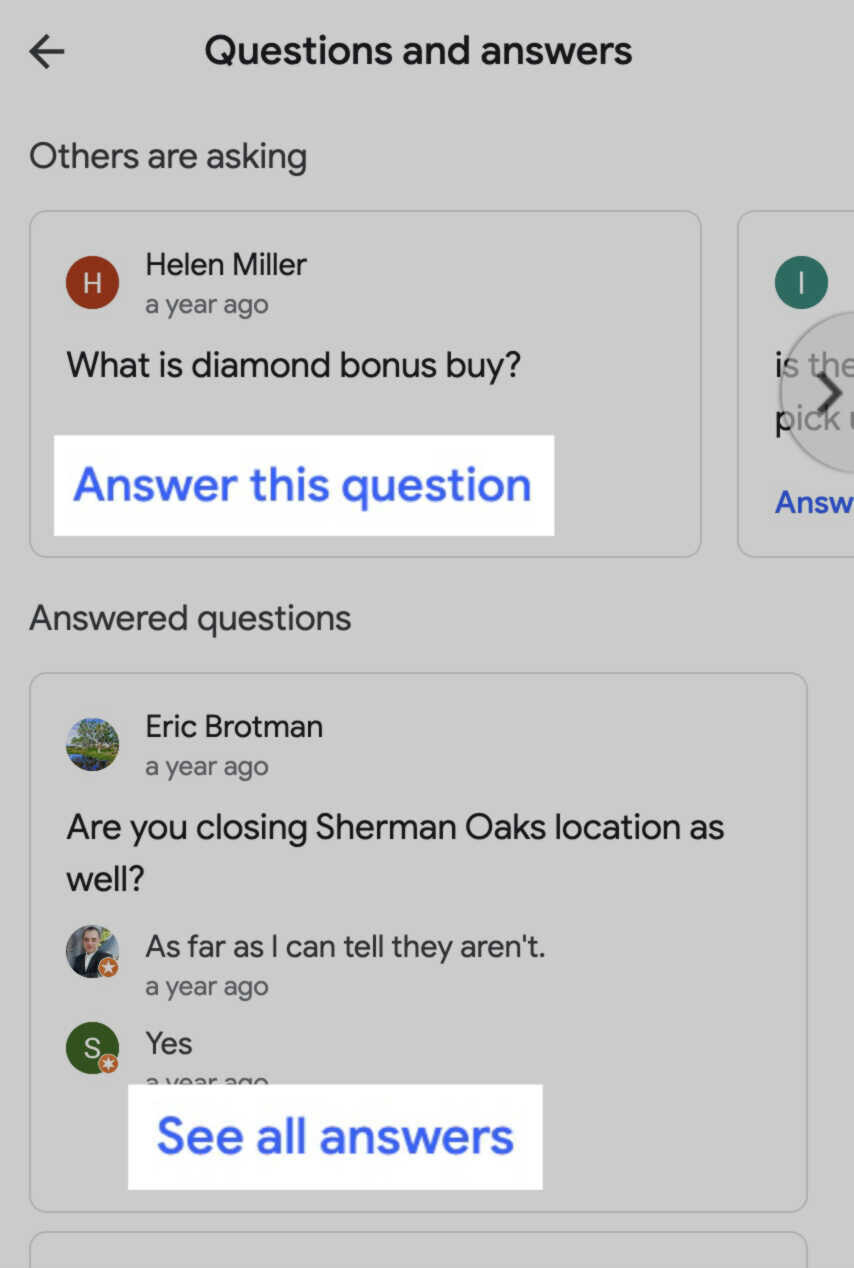
You’ll find a carousel of unanswered questions in the “Others are asking” section at the top of the page and a list of answered questions below it.

Respond to questions by clicking the “Answer this question” or “See all answers” buttons found at the bottom of each question box.
If you find outdated or incorrect answers, post the correct response. Then, click on the three dots beside the answer to report the inaccurate response.

You can also post your own questions. Treat this like an FAQ page.
Say you run a restaurant. Many customers are likely wondering if you deliver. Rather than wait for a customer to ask the question, post the question using your personal account and answer it yourself.
Sign in to your personal Google account, then search for your business on Maps.

Scroll to the “Questions and answers” section of your GBP and post your question.

Switch to your business account and answer the question.
Keep in mind that Google users can also answer questions publicly, which is why it’s best to stay on top of questions you receive. This way, you can avoid a user answering business questions incorrectly.
Select Highlights & Attributes
Using attributes (or highlights) is an effective way to show off unique aspects of your business.
Examples include: “LGBTQ friendly,” “Accepts new patients,” or “Women-led.”
Here’s how attributes look on a live listing:

To add attributes, navigate to the “Info” tab on your Business Profile and scroll down to the “From the business” section.
Click the pencil icon in the upper-right corner to edit:

Available options may differ depending on your business category.
Here are some attribute options for restaurants:
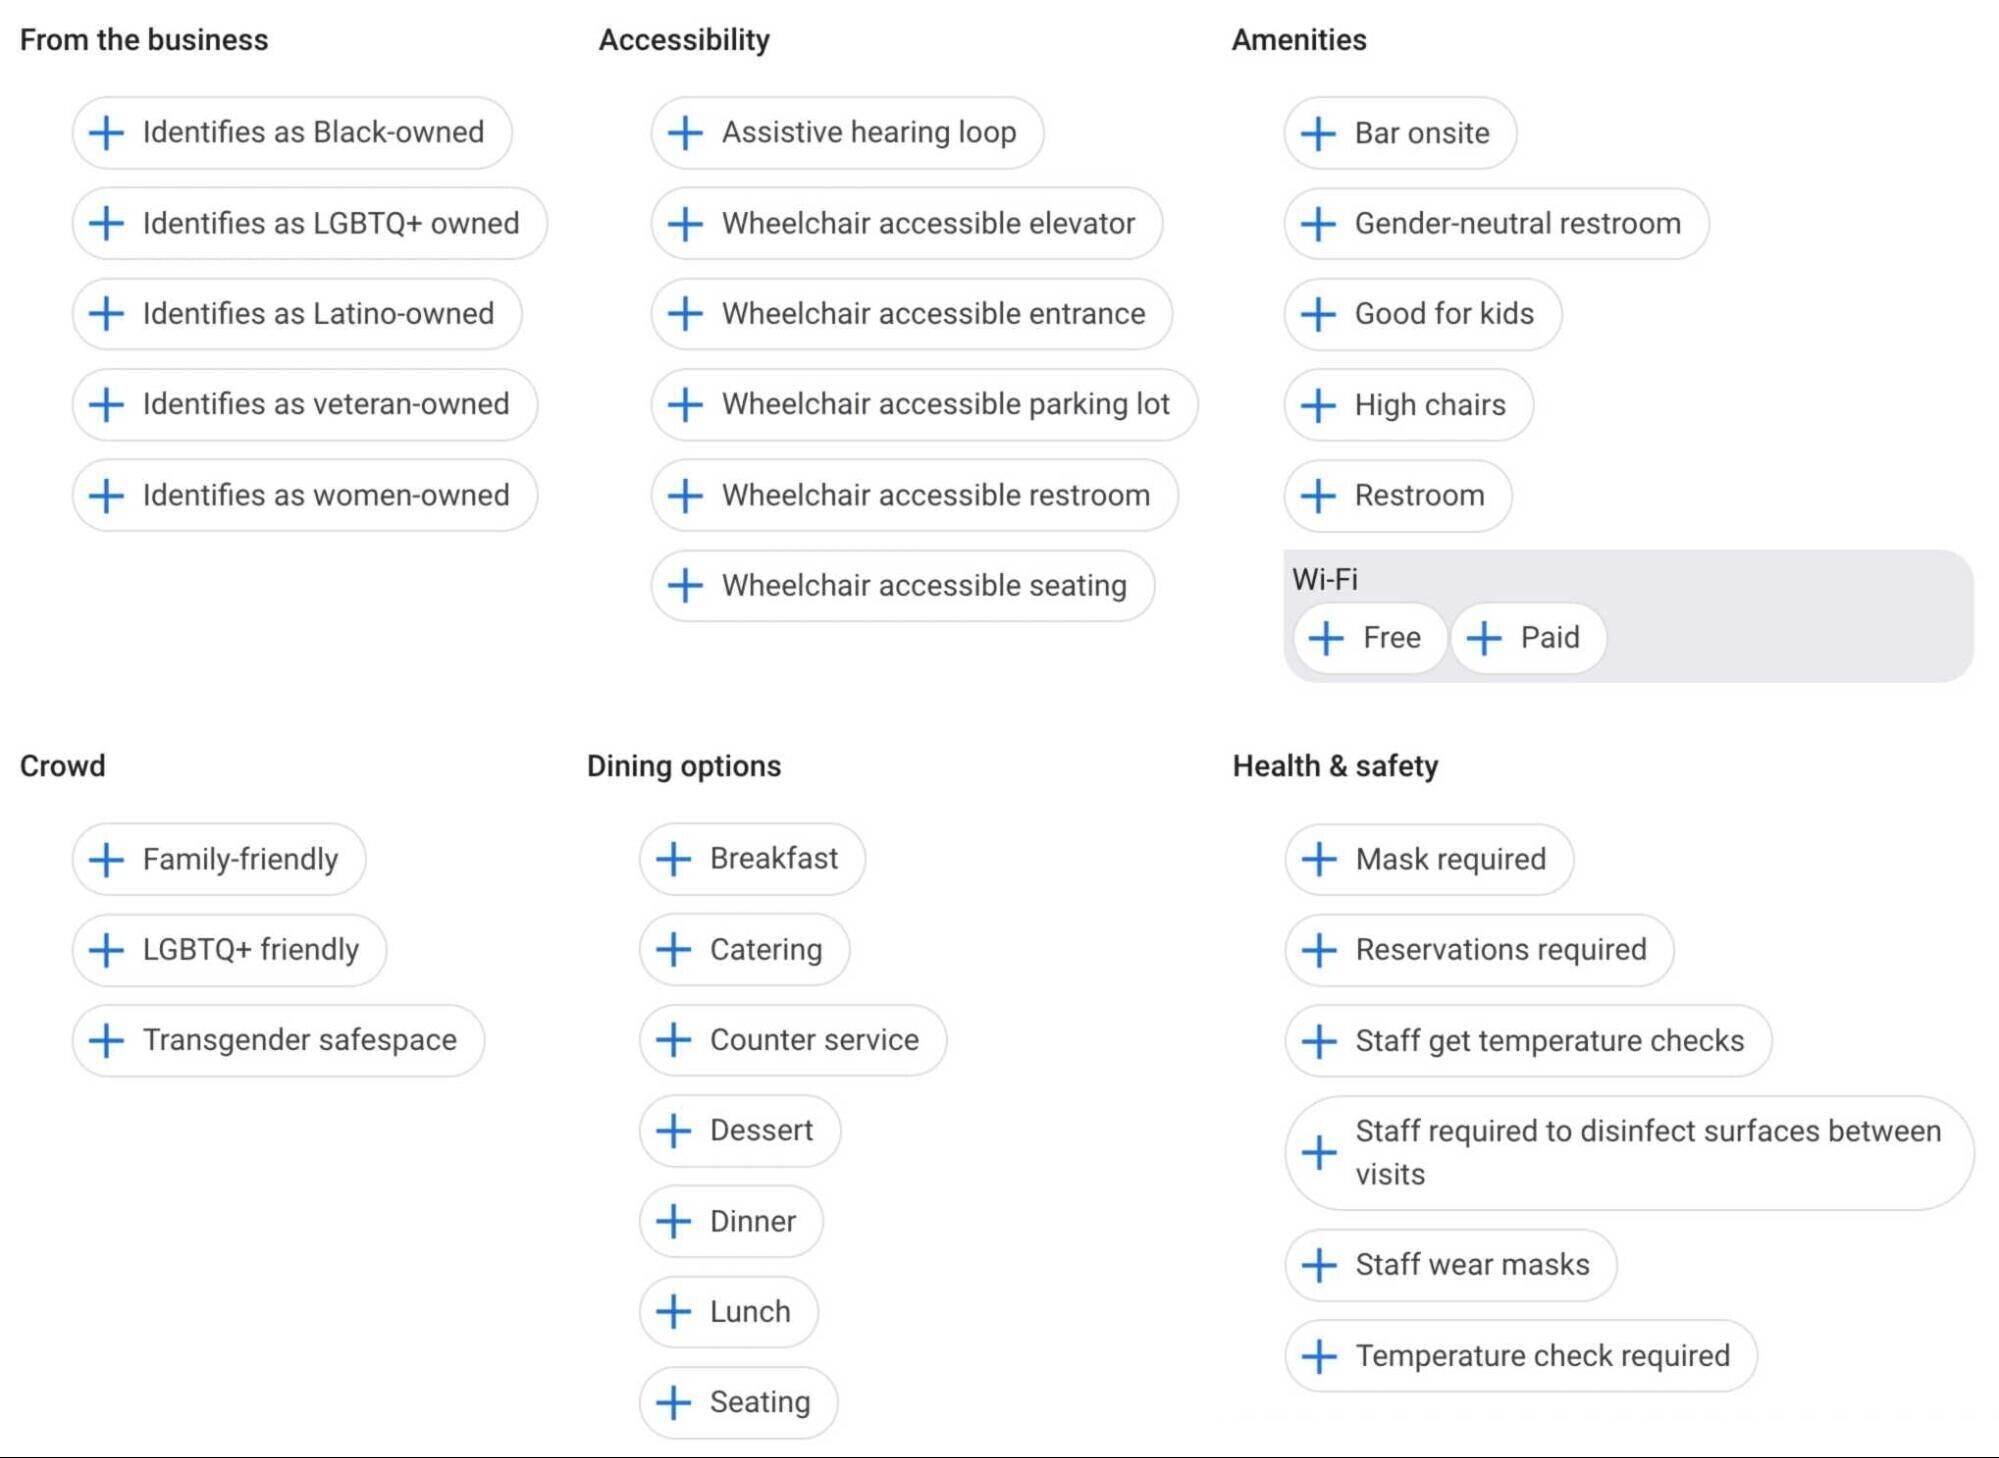
Select any relevant options for your business and hit “Apply.”

It can take up to three days for your updates to be published.
Google Business Profile FAQs
Do You Need to Have a Physical Address to Use GBP?
You don’t necessarily need a physical address to manage a Google Business Profile.
Besides physical storefronts, businesses that travel to their customers are also eligible.
For example, most plumbers don’t operate from a formal storefront or office, but they can still manage a Google My Business Page.

You will need to input an address when setting up your account, but you don’t need to display it publicly.
In short, if you engage with customers in-person, you are eligible to run a Business Profile.
Examples of ineligible businesses include: online-only businesses, rental or for-sale properties, and lead generation companies.
What to Do If You Don’t Want to Display Your Address in GBP
If you work from home and travel to your customers for the services you provide, you probably don’t want to publicize your address. (The exception is that all restaurants must use an address.)
To make your address private on your GBP, login and head to the “Info” tab.

Find your address and click the pencil icon next to it.
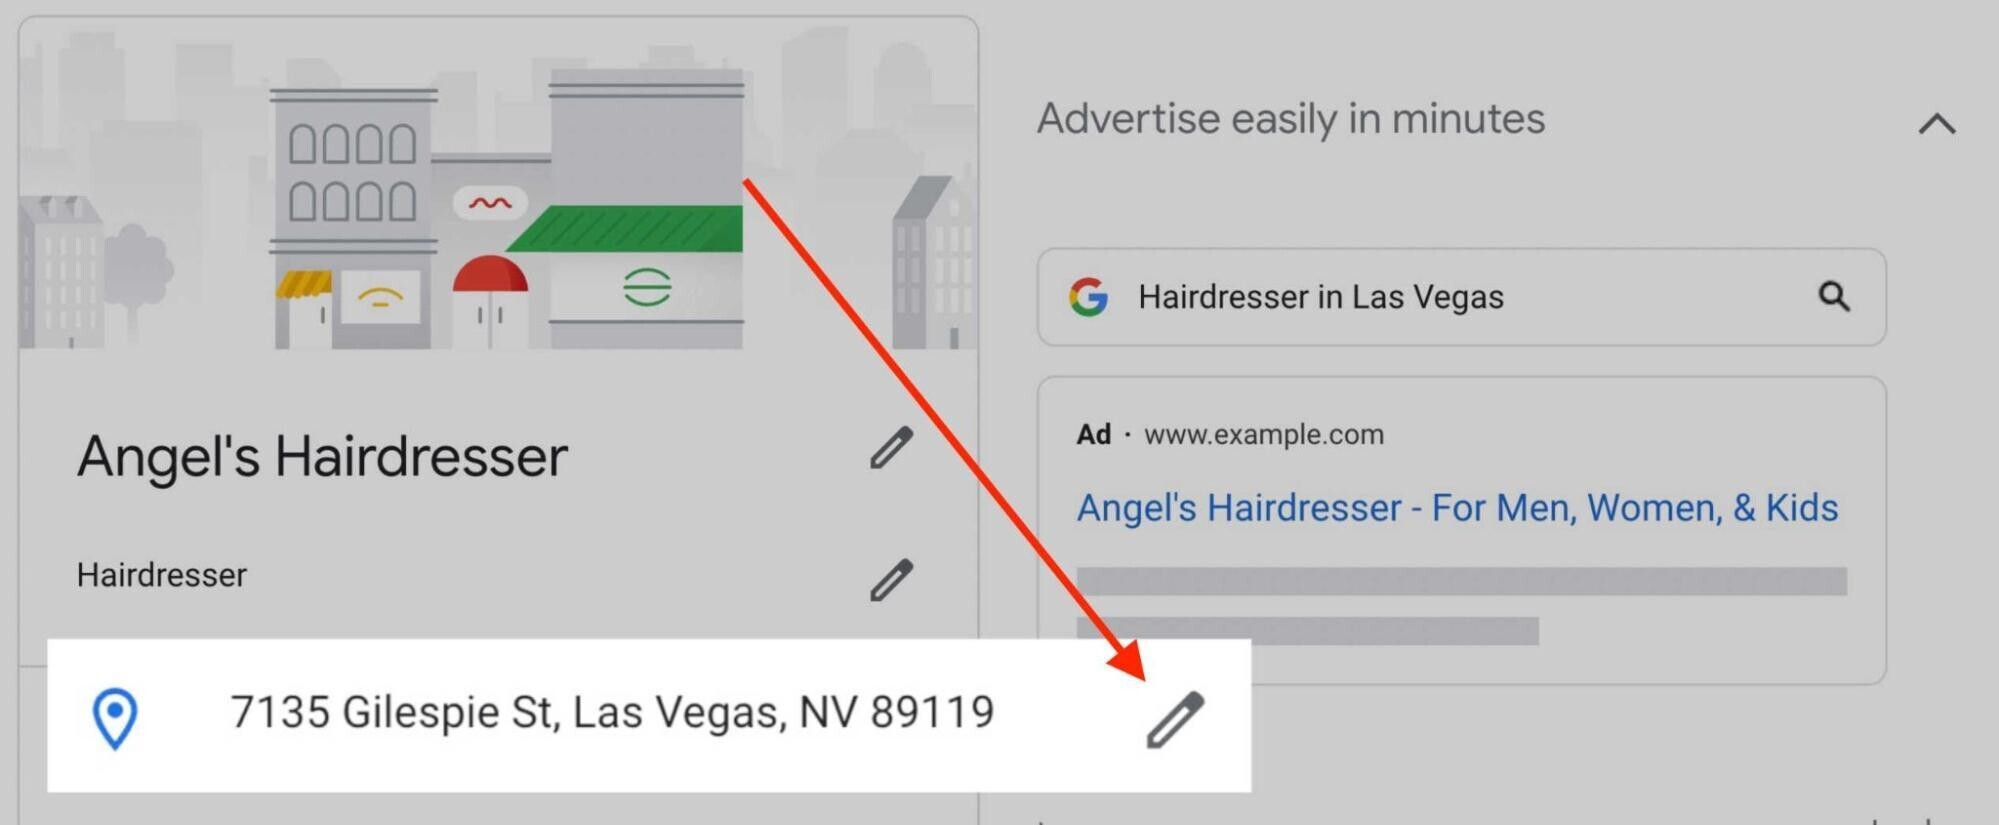
A pop-up will open with a “clear address” button near the bottom. Go ahead and click it.

As soon as you hit “clear address,” you will see a prompt telling you that your address will no longer be displayed but customers within your reach will still be able to find you.

Click “Apply” in the bottom right corner of the pop-up to save your settings.
Once you remove your address, Google will use the service area you set to determine who your profile is relevant to. Double-check that your service areas are correct to remain searchable to your potential customers.
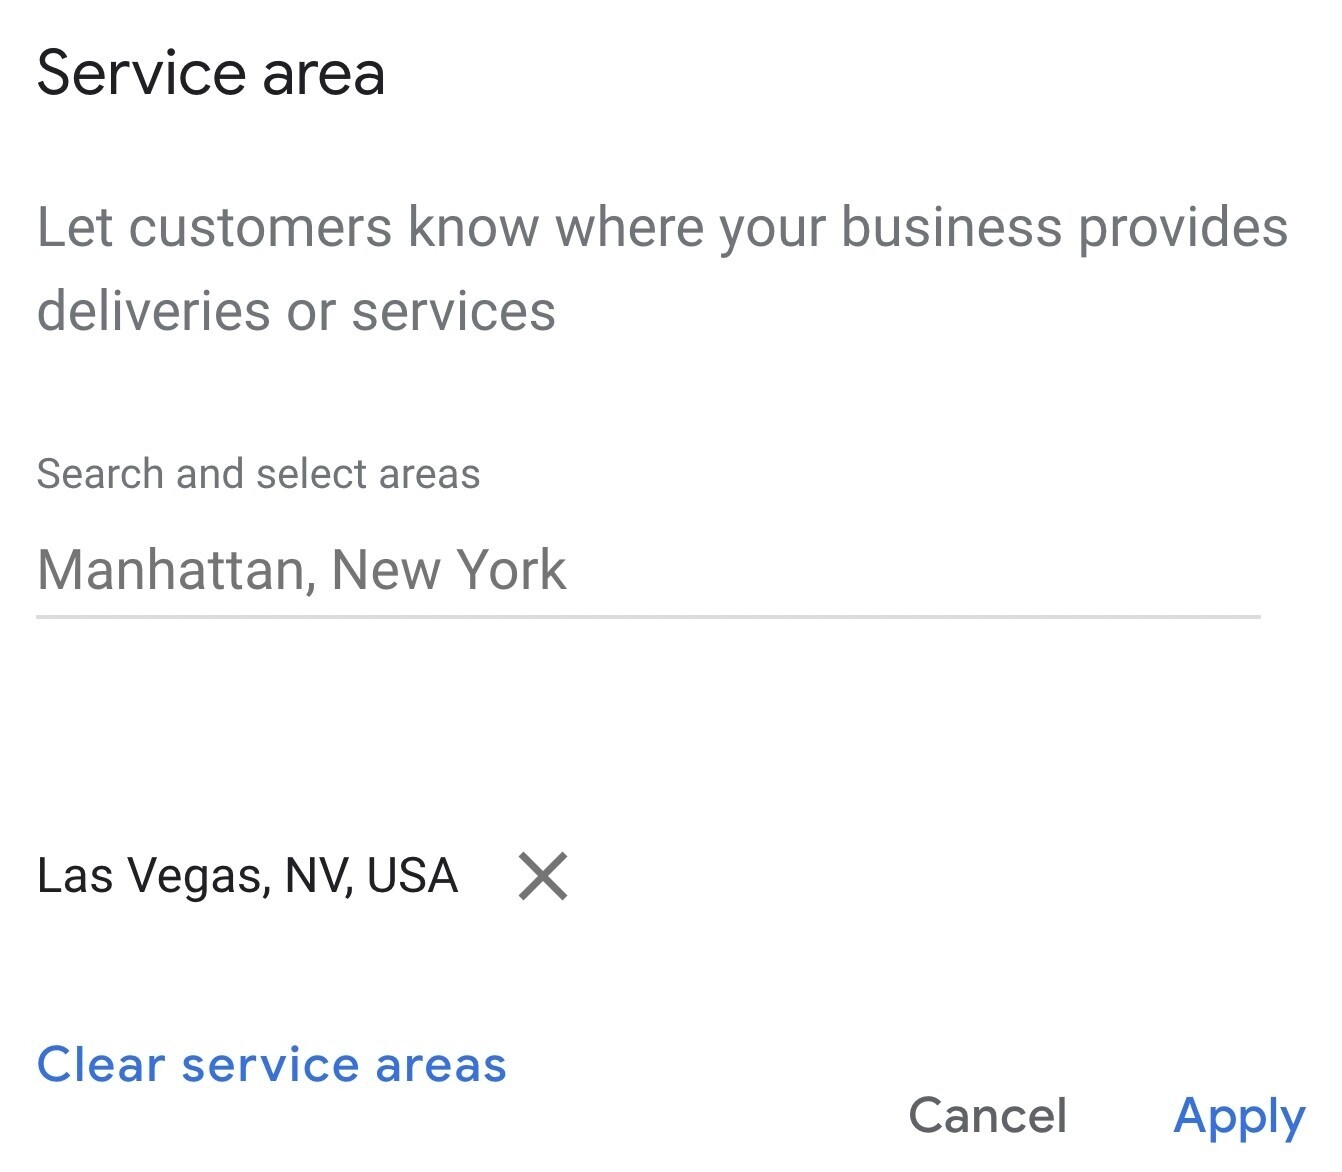
To find your service area, head back to the “Info” tab. You can find the “Service areas” setting right below your address.
Click on the pencil to open a pop-up window where you can add to or remove your existing service areas.

In the pop-up window, you can add service areas by filling in the streets, cities, and states that you serve. You can also remove existing service areas by pressing the “x” beside existing locations.
How To List More Than One Location on Google My Business Profile
If you manage more than one GBP-eligible business, you can list more than one location from one account.
These “Business Groups” provide a safe way to share management capabilities with multiple users (which is helpful for agencies working on many accounts).
Here’s how to provide an agency, coworker, or manager access to a group of locations:
- Create a business group
- Transfer any applicable business to one business group
- Add members to your new business group
You can add individual locations or import a list if you need to add many locations.
How to Change An Address on Google My Business Profile
To change your listing’s address, start by signing into your Google Business Profile.
Then follow these steps:
Step 1: If you have multiple locations, go to your “Businesses” tab and choose the location you wish to update

Step 2: Click the “Info” tab on the left-hand sidebar

Step 3: Click the “Address field”

Step 4: Enter your address and click “Apply”

If Google can’t find the address, look for the red “Set marker location” button that appears over the map of your city on the right. Click “Set marker location.”
A map will appear with a red pin, and you can drag the pin and place it at the center of your location.
Note: If your business is located in a difficult-to-find location, like the center of a shopping mall, you can drag the pin to help users locate your storefront.
When you’re done, click “apply.” It may take a few days for a Google My Business Page to review the change before it’s published.
What to Do When Your Business Category Isn’t Available on GBP
It’s best practice to choose a business category as closely related to your business as possible. This way, it’s clear to both Google and customers what you do.
There are currently almost 4,000 GBP categories. However, you may find that the perfect category for your business doesn’t exist yet.
If you don’t find the exact category you need, choose a slightly broader available category.
For example, let’s say you own a parcel forwarding company like Kwikshipper. You won’t find that category in GBP.
Instead, choose the slightly broader “Shipping and Mailing Service” category. It’s a little less specific but still relevant, making it a good option.

What Are Labels in GBP & Why Are They Important?
Labels allow you to organize multiple listings within your Google Business Profile account. If you have many listings within your account, you can easily locate the one you’re looking for by using labels.
Note that these are for organization purposes and won’t affect the performance of your listings.
If you’re managing GBP listings for a national company, you may choose to label your listings by region (i.e., “East Coast” and “West Coast”).
You can assign up to 10 labels per location, with a limit of 50 characters per label. You will find the option to add labels in the “Advanced Information’” section of the “Info” tab:

Manage Your GBP with Semrush
Maintaining your Google Business Profile is a free way to get ahead of the competition.
Be sure to fill out your business information, respond to reviews regularly, and post about news and events. Keeping your profile up to date is a great way to improve your local search presence and get leads.
To automate the process and maintain multiple listings easily, rely on the Listing Management tool.
[ad_2]
Source link