
[ad_1]
In digital design, Figma has earned its place as a go-to tool, celebrated for its ease of use and robust features. One of its many powerful features is its text editing capabilities, a necessity for any designer who wants to communicate effectively through their designs.
In this guide, we will dive into the nuances of editing text in Figma. From basic adjustments to more complex typographic manipulations, you’ll learn how to take full control of your text elements.
Get ready to enhance your designs with engaging and polished text in Figma.
2 million+ Figma graphic templates and more with unlimited downloads
Download thousands of Figma graphic templates, UI kits, and web templates with an Envato Elements membership. It starts at $16 per month, and gives you unlimited access to a growing library of over 2,000,000 Figma templates, design assets, graphics, themes, photos and more.
Understanding text in Figma
Figma supports various text properties, such as font, size, color, alignment, and spacing, so you can create text elements that match your design requirements. You can also take advantage of advanced features such as auto-fit and text components to create more flexible and efficient designs. Here’s a quick overview of the key aspects of working with text in Figma:
- Text Layers: Text elements in Figma are contained in text layers, which can be created, edited and styled independently.
- Text properties: Customize your text using various properties including font, size, weight, color, alignment and more.
- Auto Change: Automatically resize text layers based on their content or fixed dimensions.
- Text Components: Use components and instances to create reusable and easily updateable text elements.
Now that you have a basic understanding of working with text in Figma, let’s dive into the process of text editing.
Edit text in Figma
Follow these steps to edit text in Figma:
1. Create a text layer
To create a new text layer, click the “Text” tool (T) in the toolbar or press the “T” key on your keyboard. Click on the canvas where you want to add the text and start typing.
2. Select the text layer
To edit an existing text layer, click on the text layer in the canvas or select it in the layers panel.
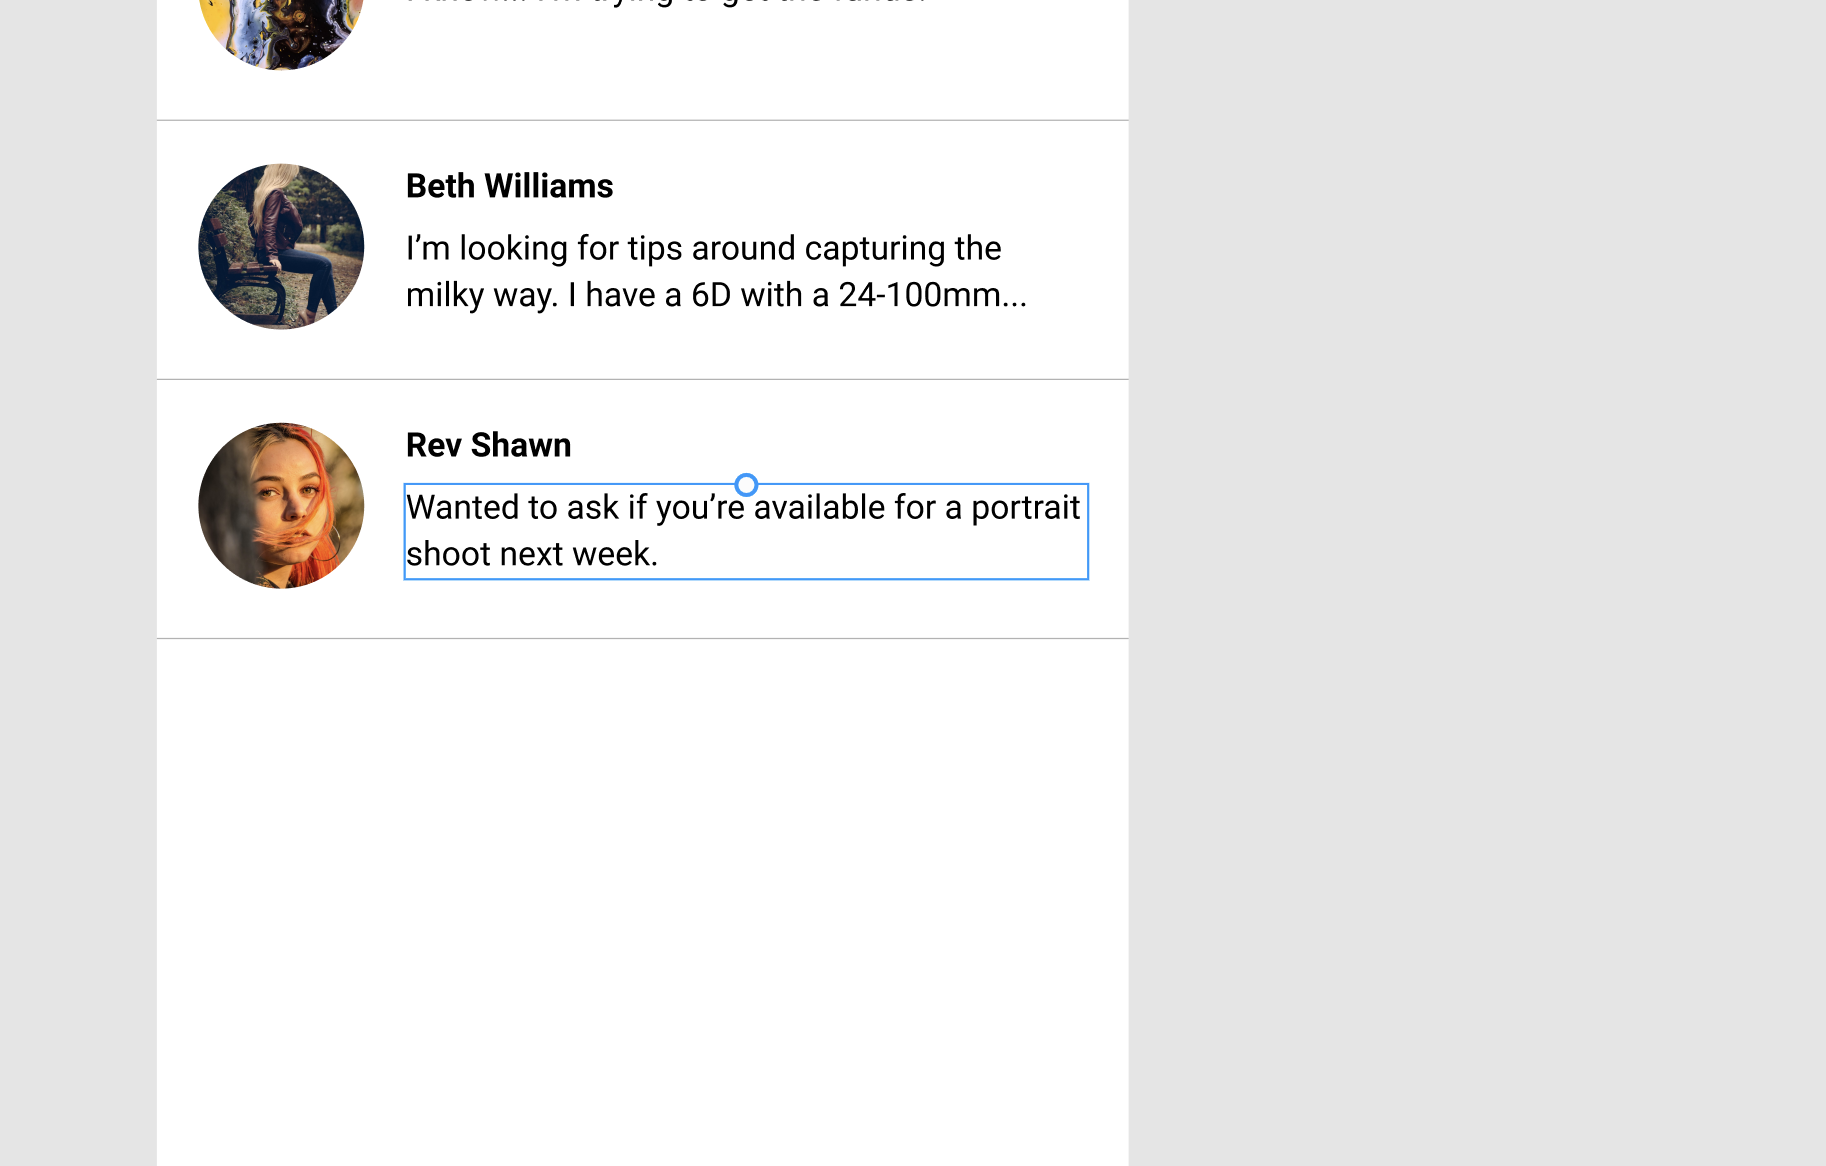
3. Edit the text content
With the text layer selected, double-click the text to enter text editing mode. You can now edit the text content by adding, removing or changing characters as needed.
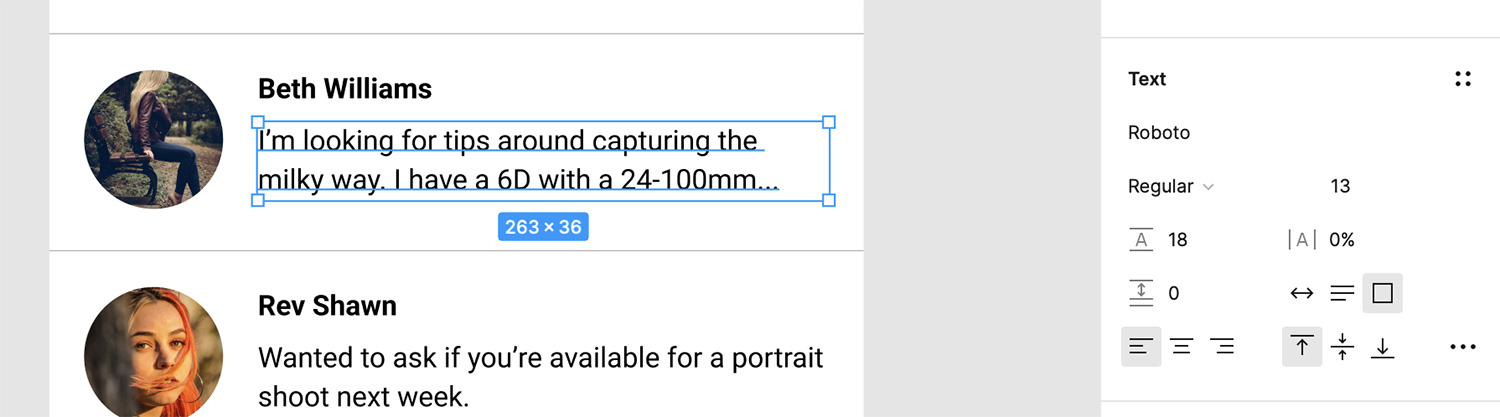
4. Adjust text properties
With the text layer selected, use the right-hand panel to adjust text properties such as:
- Font: Choose a font family from the available options or import custom fonts.
- Size: Adjust the font size to fit your design.
- Weight: Set the font weight (eg Regular, Bold, Italic).
- Color: Change the text color using the color picker or by entering a HEX, RGB or HSL value.
- Alignment: Align the text to the left, center, right or justify it.
- Line height: Adjust the space between lines of text.
- Letter Spacing: Change the space between individual characters.
- Paragraph Spacing: Control the space between paragraphs.
5. Set options for automatic resizing
In the right-hand panel, you can set auto-sizing options for your text layer:
- Auto width: The text layer’s width automatically adjusts based on its content, and line breaks are inserted manually.
- Auto height: The text layer’s height automatically adjusts based on its content, while the width remains fixed. Text will wrap to fit the fixed width.
- Fixed size: Both the width and height of the text layer remain fixed, and text can be clipped or overflowed if it does not fit within the specified dimensions.
6. Create text components
To create reusable text elements, select the text layer and click the “Create Component” button in the right panel or press Ctrl + Alt + K (Cmd + Option + K on macOS). This will create a text component that can be used as an example throughout your design, making it easy to update text styles globally.
Tips for editing text in Figma
Keep these tips in mind to make the most of Figma’s text editing features:
- Use text styles: Create and apply text styles to maintain consistency across your design and simplify updates.
- Organize your text layers: Keep your Figma file organized with well-named text layers and group them as needed. This makes it easier to find and edit text elements in your design.
- Use typography best practices: Consider readability, hierarchy, and contrast when customizing text properties to create visually appealing and accessible designs.
- Experiment with custom fonts: Import custom fonts to Figma or use Figma’s font service to enhance your design with unique typography.
- Collaborate and get feedback: Make the most of Figma’s collaborative features by sharing your design and gathering feedback from clients and teammates. This can help you refine your text elements and improve your overall design.
By following these steps and tips, you can create engaging and visually appealing text elements in Figma. Text plays a crucial role in the design process, and Figma’s powerful and user-friendly text editing features make it an ideal choice for designers who want to create efficient and effective designs.
[ad_2]
Source link